The Ultimate Timeline for Planning Your Thanksgiving Dinner

Holidays, Lifestyle

The nation’s biggest meal is upon us! If you are playing host(ess) this Thanksgiving, I’m delighted to share this 2-week dinner prep timeline to help you manage your time and stress leading up to the holiday. No one wants to be frazzled and rushed on Thanksgiving Day! As the person who is sacrificing their time, their home, their kitchen, their money and their sanity to host such a monumental meal, you deserve to mingle with your guests, have a glass of wine… heck, you even deserve to take some time to sit down and rest!

How gorgeous is this outdoor Thanksgiving tablescape? Stole this inspo from andeelayne.com.

You’re probably wondering what makes me qualified to share this Thanksgiving dinner prep timeline. As I’m writing this post, I’m preparing to host my 9th Thanksgiving in California. While I’m probably not as experienced as your granny who’s been making Thanksgiving for decades, I feel like I’ve learned all the rights and wrongs of how to prep for the “big feast” over the last 9 years with minimal help. You see, while I host 6-12 family members for Thanksgiving every year, I don’t actually have any family that lives close by to help prepare dinner (all of our relatives live in Texas). Other than my mother lending me a hand in the kitchen the day of Thanksgiving, there’s rarely any other assistance or delegation for the meal. My family is usually staying in hotels, so unless they pick up something from a restaurant or grocery store, no one is bringing appetizers and side dishes to contribute. And, to be honest, that’s okay with me. There’s no old auntie who insists on bringing her infamous green jello salad (thank god), so I have full liberty to craft our family’s Thanksgiving to my liking. Wow, that makes me sound like a control freak, which I promise I’m not — or am I?! No, what its really about is that I’m delighted to GIVE this meal to my family for Thanksgiving. What an honor it is to have so many family members travel thousands of miles to spend Thanksgiving with us. My husband and I are both the babies of our families, and it’s our way to thank our parents and older siblings for everything they’ve done for us over the years and thank them for making the trip to be with us on this holiday.

Below, you’ll find my 2-week Thanksgiving timeline with suggestions for food, drink and table preparations. This is the timeline I follow every year for a nearly seamless Thanksgiving Day where I can actually relax, sit on our balcony and chat with with my family and sip sangria while taking in our home’s beautiful SoCal mountain views.

If you’d like to learn from some of my past Thanksgiving hosting mistakes (or just have a good laugh!) scroll to the bottom of this post where I share three “Turkey Day Dinner Blunders.”

Ultimate Thanksgiving Dinner Prep Timeline:

2 Weeks Before

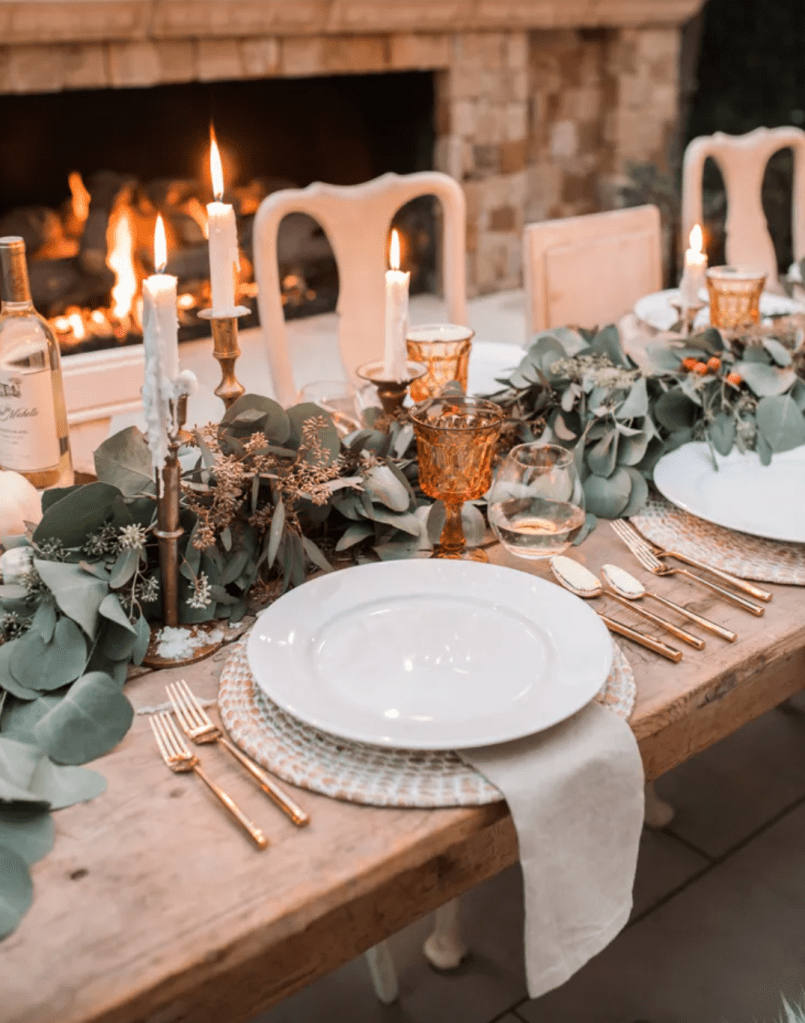
  • Plan out your table – Pull out your serving ware, dishes, table linens and décor you plan to use for Thanksgiving dinner. Make sure you have enough chairs for everyone.
  • Take inventory of kitchen tools – Is your food processor still missing that one blade? Do you know where your turkey baster is? Is it time to upgrade your mixer? Now is the time to locate and update your cooking gadgets, especially if you haven’t seen them in a while.
  • Plan your dinner and make your shopping list – List everything you plan to serve. Make note of the spices and ingredients you already have on hand and make a list of what you need to purchase.

Weekend Before

  • Buy your turkey and non-perishable food products and drinks – If your turkey is frozen, put it in the refrigerator to thaw. Stock up on your canned beans and vegetables, dried seasonings, nuts, seeds and beverages.
  • If you’re planning to make casseroles and desserts ahead of time and freeze them, make them now – For less stress on the day of Thanksgiving, desserts, dressing and casseroles, like sweet potato casserole, corn casserole and macaroni and cheese, can often be frozen then reheated in the oven.

3 Days Before

  • Shop for perishable food products – This is when you purchase your produce and dairy so it’s fresh for cooking the big meal

Day Before

  • Move frozen casseroles and dessert to fridge – If you made and froze your casseroles and dessert ahead of time, this is now the time to start letting them thaw.
  • Make remaining casseroles and dressing – If you didn’t already make your casseroles and freeze them, make them now and keep in the refrigerator until one hour before dinner.
  • Prep for remaining dishes and sides – Chop vegetables, make yeast rolls recipe to rise overnight, try to do as much as possible to make your holiday easier, and make a list of when everything should go in the oven tomorrow to be ready at the same time.

Thanksgiving Morning

  • Take the turkey out of the refrigerator and start prep – Let your turkey sit for 2 hours at room temperature before roasting. Plan on 13 minutes of roasting time for every pound or 15 minutes per pound if stuffed. You can view my Thanksgiving Turkey recipe here.
  • Set the table and arrange any centerpieces.
  • Get wine chilling and get your cocktail/drink station ready.

3-4 Hours Before Dinner

  • Assemble appetizers and remaining side dishes – Get as much completed as possible. You can always reheat dishes the hour before dinner.

2 Hours Before Dinner

  • Turn on music – Before guests arrive, set the mood for your party with music. Town & Country created a great Thanksgiving music playlist if you need inspiration.
  • Set out appetizers – The focus of the day is Thanksgiving dinner, so don’t stress about this too much. Some simple cheeses, crackers, fancy nuts and a fruit bowl is perfect. I also love the ease of premade snacks from my grocer’s freezer section and premade cheeseboards and dips from the deli section.
  • Set out drinks – Have your chilled wine and signature cocktail (if you’re making) easily accessible to guests. If dinner’s late, they won’t care if they have a drink in hand and some simple snacks! My guests have always enjoyed this Thanksgiving Sangria. I also fill a large pitcher with ice water and sliced lemons.
  • Let casseroles come to room temperature.

1 Hour Before Dinner

  • Take turkey out of oven – You turkey needs to rest 30 minutes to 1 hour before carving.
  • Reheat casseroles – Adjust oven temperature to

30 Minutes Before Dinner

  • Carve the turkey.
  • Assemble salad if making.

15 Minutes Before Dinner

  • Set out food – Take everything out of the oven and set on your dinner table or buffet table.
  • Light candles if using.
My 2022 roasted turkey was beautiful! My secrets for the best-ever juicy turkey include (1) cooking the bird breast side down for the majority of the roasting, (2) seasoning with Williams Sonoma turkey seasoning paste and (3) topping with Williams Sonoma turkey roasting glaze the 30 minutes of roasting.

Turkey Day Dinner Blunders

As promised, here are some of the silly mistakes that I’ve made when hosting Thanksgiving. Learn what not to do from my past blunders!

But it ain’t got wing: My first year hosting, I was intimidated to make a turkey, so I bought a premade smoked turkey from a local BBQ joint thinking that my barbecue-loving Texan relatives would get a kick out of it! I ordered a 12 lb. turkey to feed 8 adults. Well, when I went to pick up the turkey on Thanksgiving Day, they gave me a turkey that was 9 lb. because they “ran out” of the larger turkeys. I had no other choice so last minute, so I took the smaller turkey. Not only did we not have enough meat to happily feed everyone, the turkey was missing a wing… so it was ugly! I’m thankful to my mom and sister-in-law for offering to only have a “taste” of turkey that year. Lesson learned: If you’re going to order a premade turkey, make sure its from a reputable seller who guarantees the size of the turkey you ordered! This was my first time ordering from the restaurant and found them on an internet search. There wasn’t many restaurant reviews, so I should have taken it as a sign to order something else from them to test before Thanksgiving or at least be a bit skeptical!

When more is a bore: My second year hosting, our house was being renovated, so we rented a condo in Newport Beach to host everyone. Because I had a 3-month-old baby and wasn’t stoked about cooking a large meal in a kitchen I was unfamiliar with, I ordered a premade Thanksgiving dinner from a local grocery store. I was scarred from not having enough turkey the year before, so I over-ordered. I justified spending the extra money with that we’d be able to eat leftovers for a few days and I wouldn’t have to cook (I was an exhausted first-time mom and business owner at the time!). Not only did we have way too much food — think three 9×13 baking dishes of mashed potatoes — the food was TERRIBLE! The stuffing was so bland. I kept adding butter and seasoning trying to spruce it up. The salad was so boring with only iceburg lettuce, diced tomatoes and mini croutons. The turkey was so dry that I was dipping it in BBQ sauce. It was the saddest waste to dump multiple containers of uneaten food in the trash. We considered trying to donate it, but couldn’t figure out all the logistics in time. Lesson learned: Don’t overdo it on food. Again, if you order premade anything, make sure its reputable with good reviews — it’s even better if a friend who’s tried it recommends it!

Don’t dispose-ALL: One year, I was doing a lot of prep work the day before Thanksgiving. As I was cutting and chopping all of the vegetables that I would use in the stuffing, green bean casserole, and sweet potato casserole, I put all of the veggie waste in our sink’s disposal. I grew up in a house where we put everything in the disposal (banana peels, rotten bunches of lettuce, egg shells… seriously, everything!) in an effort to not stink up the trash, and I didn’t realize that this is not normal behavior until I started living with someone else. Sure enough, I clogged our sink, and boy did it STINK! Every time I turned on the disposal, smelly toxic green-brown sludge came spewing from the drain! It took us the evening and half of Thanksgiving Day to fix, so I was so delayed in prepping my meal without access to the kitchen sink. Needless to say, my Mr. Fix-It (A.K.A. my husband) was not very pleased. And, I hated feeling rushed to make all our dinner the day of Thanksgiving. Lesson learned: Not everything needs to go in the disposal. Also, have a handyman on-call who can come help fix any last-minute house repairs before guests arrive. It seems something in our house always breaks right before we host guests!

Now that I’m looking back, these Thanksgiving mishaps are hilarious! And, I realize that this is what Thanksgiving is about… It’s about the effort. It’s about wanting to create a meal that’s meaningful for your family. It’s not going to be perfect, but you’re going to learn a lot. I also believe that hosting Thanksgiving and the mistakes that can come with it is almost like a rite of passage. I watched my mother host Thanksgiving so many times, and while most of my memories are of how it appeared as though she effortlessly perfected an elaborate meal, I also remember her burning rolls, undercooking the turkey, forgetting to thaw the dessert and other funny little blunders. If you’re not able to execute your perfect Thanksgiving meal as you envisioned, brush it off. From my Thanksgiving missteps examples, I hope you can rest easy knowing you’re not the only one. And, you have 365 to try again (haha!).

Thanksgiving tablescape inspo! I dream of hosting an outdoor Thanksgiving like this one day! Image is from kpetersondesign.com.

Please let me know if this timeline is helpful and if you have any questions in the comments below. Connect with me on Instagram and TikTok for easy recipes, party ideas and tips to simplify your life!

XO Maggie

Simple Quiche Lorraine Recipe

Cooking

After I gave birth to my firstborn, my neighbor brought over a quiche, and I thought it was the best postpartum food gift ever! Quiche is good for breakfast, lunch, dinner or even a snack, and it was amazing not to worry about cooking or ordering food in those first few days home with a newborn!

I appreciated that postpartum quiche so much that I now I try to give a quiche to all my mama friends with a newborn. This classic Quiche Lorraine recipe is my go-to, because it’s so easy and absolutely delicious. Salty bacon, fluffy eggs, creamy gruyere cheese and a flaky pie crust make this quiche a real winner. I like to use a frozen pie crust to cut time and make this recipe even simpler!

The quiche I made from the recipe below (adapted from Delish.com) is headed to one of my mama friends, and I doubled the recipe to have one for our family.

Easy Classic Quiche Lorraine

Ingredients:

  • 1 9-inch pie crust, frozen
  • 8 slices bacon
  • 1 1/2 cups shredded Gruyère, divided
  • 1 shallot, minced
  • 6 large eggs
  • 1 1/2 cups heavy cream
  • Pinch of cayenne
  • Pinch of nutmeg
  • Kosher salt
  • Freshly cracked black pepper
  • Chopped green onion (optional)

Directions:

  1. Preheat oven to 375°. Allow frozen pie crust to thaw for 10-20 minutes. Use a fork to prick holes around the bottom and sides of the crust. Bake for 5-10 minutes.
  2. While pie crust is baking, cook bacon until crispy in a skillet over medium heat, about 8 minutes. Transfer to a paper towel-lined plate to drain.
  3. Scatter cooked bacon on pie crust with 1 cup Gruyère, shallot and green onions.
  4. In a large bowl, whisk together eggs, cream, cayenne, and nutmeg and season with salt. Pour mixture over bacon and cheese. Sprinkle with remaining 1/2 cup cheese.
  5. Bake until crust is golden and eggs cooked through, 40 minutes. Let cool 15 minutes before slicing and serving. Enjoy!

What other variations of quiche do you like? Let me know in the comments below if you try this recipe! Or, connect with my on Instagram and TikTok!

Easy Avocado Smoothie Recipe

Cooking, Health & Wellness

AFFILIATE DISCLOSURE: Some of this post contains affiliate links for the products I use and LOVE. If you take action on these links (like clicking, buying, etc.), I may receive compensation at no cost to you. As always, all opinions are my own, and I’ll only recommend what I truly like and recommend. For more information about affiliates and your privacy, view our Terms & Conditions page here.

I recently had my wisdom teeth extracted, so smoothies have been my morning go-to to get optimal nutrition while avoiding chewing. I was getting bored of my usual fruit smoothies so started testing out different recipes, and I believe I have perfected the best avocado smoothie! Scroll down to get the recipe, and be sure to read to the bottom to get my comfy morning smoothie essentials!

Are avocados good in smoothies?

It might sound a bit odd to add an avocado to your smoothie, especially if you’re used to the typical smoothies with a banana base. But, let me assure you that the texture of avocado makes them perfect for creamy, rich smoothies – almost like a milkshake! The taste of avocado is super mild and we add fruit for sweetness, so you don’t end up with a smoothie that tastes like a raw avocado with this recipe. If you like your smoothies extra sweet, I recommend adding 1 tsp. of pure maple syrup to the recipe.

Are avocado smoothies good for you?

In addition to this avocado smoothie tasting great, it’s also jam-packed with health and beauty benefits! According to Medical News Today, avocados are a source of vitamins C, E, K, and B6, as well as riboflavin, niacin, folate, pantothenic acid, magnesium, and potassium. They also provide lutein, beta carotene, and omega-3 fatty acids, which is great for eye and brain health and improves bone and joint function. Avocados contain high levels of healthy, beneficial fats, which can help a person feel fuller between meals. I drink this smoothie in the morning, and it keeps me full until lunchtime! Omega-3’s are also known to regulate your skin’s oil production and boost hair growth, so this is truly a beauty-boosting smoothie!

What do I need to make an avocado smoothie?

My avocado smoothie recipe is made with only 4 ingredients! Or, 5 ingredients if you are adding protein powder, which I recommend! Some people like their smoothies on the sweeter side, so if that’s you, I also recommend adding 1 tsp. of pure maple syrup. Of course, you’ll need one ripe avocado – our star ingredient! You can tell its ripe by gently squeezing the avocado. If it’s soft, but not mushy, it’s ready to eat! You also need your preferred milk (I like Almond MALK), vanilla extract and frozen fruit. My favorite frozen fruit for this recipe is pineapple, mango or strawberries, because they give the smoothie that extra bit of sweetness that avocado is lacking. If you’re using protein powder, I recommend Tone It Up Plant-Based Protein + Greens Powder, because it has everything you want in one scoop:15 grams of protein, 14 leaves of kale, 4 leaves of spinach and a floret of broccoli with a creamy texture and delicious vanilla flavor. Plus, it’s plant-based protein, non-GMO, gluten free and kosher with nothing artificial! As mentioned before, avocados are quite bland, so if you want to kick up this smoothie’s flavor, add a dash of salt before blending.

You’ll also need a powerhouse blender, like my Ninja Professional Plus Blender, to make your smoothie, well, smooth. This blender has a powerful motor and extra sharp blades designed for superior crushing, so it’s perfect for creating your smoothies, frozen drinks or even ice cream! I personally love how easy it is to clean. And, it’s dishwasher safe!

Ninja Professional Plus Blender

After my smoothie is done, I like to pour it into a nice glass and drink with a fancy gold straw. It feels so much better than those yucky paper cups and straws you get at smoothie shops, ya know? Try it — I think you’ll love it served that way, too!

Stainless Steel Gold Straws

Easy Avocado Smoothie Recipe

Ingredients:

  • 1 ripe avocado
  • 1 1/2 cups milk of choice (my favorite is Almond MALK)
  • 1 tsp. pure vanilla extract
  • 1 cup frozen fruit (I recommend mago, pineapple or strawberry)
  • 1 scoop protein powder (optional, but I love to use Tone It Up Plant-Based Protein + Greens Powder)
  • 1 tsp. pure maple syrup (optional for added sweetness)
  • A dash of salt (optional)

Directions:

Peel the avocado, discard the pit and add into the blender. Add remaining ingredients into the blender and blend until smooth. Serve immediately.

Enjoy this easy, yummy avocado smoothie, beauties! Let me know what you think in the comments below, and be sure to follow me on Instagram and TikTok for more easy recipes!

Check out my comfy and beautiful morning essentials for the best smoothies:

  1. Good American Sweater
  2. Abercrombie & Fitch Joggers
  3. SLIP Scrunchies
  4. Fuzzy Slippers
  5. Gold Hoops
  6. NINJA Professional Blender
  7. Tone It Up Protein + Greens
  8. Pretty Glassware
  9. Gold Stainless Steel Straws

Easy July 4th Trifle Recipe

Cooking, Holidays

If you’re looking for an impressive July 4th dessert that takes little effort, this festive red, white and blue trifle checks all the boxes! It’s yummy, easy, and fun! This dessert is sure to be the hit of your July 4th party!

Easy and festive July 4th trifle!

This “almost homemade” July 4th trifle is made with simple ingredients easily found at your local grocer: pre-made angel food cake, Cool Whip, strawberries and blueberries – that’s it!! If you don’t have a trifle dish, you could use a large clear glass bowl. This recipe is perfect for a 2.5 to 3-quart trifle dish. I used a large 5.5-quart trifle bowl, so I doubled this recipe.

The red, white and blue from the strawberries, blueberries and Cool Whip makes it perfect for the Fourth of July! Once you’re finished assembling the trifle, create a pretty flag design with the berries as a topper for an Instagram-worthy party table centerpiece!

Easy July 4th Trifle Recipe

Easy July 4th Trifle

Ingredients:

  • 1 13-16 oz. angel food cake, cut into 1-inch cubes (easiest if pre-made from your grocer’s bakery or you can also do a simple cake mix)
  • 1 quart sliced strawberries
  • 1 pint blueberries
  • 2 8 oz. containers Cool Whip
    • *reserve a few strawberries and blueberries for topping

Directions:

  1. In a 2.5 to 3-quart trifle dish or large glass bowl, layer half of the angel food cake, strawberries, blueberries and then one container whipped topping. Repeat layers with remaining angel food cake, strawberries, blueberries and second container whipped topping.
  2. Create an American flag design with your remaining blueberries and strawberries to top your trifle.
  3. Serve immediately or store in the refrigerator until ready to serve. Best enjoyed within 24 hours.

Watch me make this Easy July 4th Trifle on Instagram:

July 4th Trifle on Instagram!

Let me know if you plan to try this for your July 4th party by commenting below or connecting with me on Instagram or TikTok!

Festive Red, White and Blue Dessert!

AFFILIATE DISCLOSURE: Some of this post contains affiliate links for the products I use and LOVE. If you take action on these links (like clicking, buying, etc.), I may receive compensation at no cost to you. As always, all opinions are my own, and I’ll only recommend what I truly love. For more information about affiliates and your privacy, view our Terms & Conditions page here.

Recipe: Chocolate Dipped Peanut Butter Rice Krispy Treats

Cooking, Holidays, Home, Kitchen

Rice Krispy Treats are a classic childhood favorite! I wanted to make our homemade version more special than what you can get at the store, so I added peanut butter to the recipe and dipped them in chocolate! Make these Chocolate Dipped Peanut Butter Rice Krispy treats festive for a holiday or themed party by adding colored sprinkles. We made these treats for spring, so I used pink and blue sprinkles!

Chocolate Dipped Peanut Butter Rice Krispy Treats

Chocolate Dipped Peanut Butter Rice Krispy Treats Recipe

Ingredients:

Instructions:

  1. Spray an 9″x 13″ (or 8″x 8″ for thicker bars) casserole dish with nonstick cooking spray.
  2. In a 4 quart sauce pan, melt butter on low heat. Do this slowly, you don’t want burned or brown butter here.
  3. Once butter has melted, keep heat on low and add mini marshmallows.
  4. Once marshmallows begin to soften and melt, add peanut butter.
  5. At this point, you will need to constantly stir the mixture so the peanut butter does not burn and the marshmallows can evenly melt (won’t take too long, about 5 minutes or so).
  6. Once, mixture is combined and melted, turn off heat and remove pan from stove.
  7. Add Rice Krispy cereal to sauce pan and stir until evenly coated with mixture. This is sticky stuff so do your best to get it all combined.
  8. Pour mixture into casserole dish (it will look very loose.) Spray your hand with some nonstick cooking spray and pat down the mixture until firmly compacted.
  9. Allow 30-45 minutes for treats to set up. Cut into small squares or rectangles.
  10. Melt white or dark melting wafers in a small bowl according to package instructions.
  11. Dip one end of Rice Krispy treat into bowl of chocolate, top chocolate with sprinkles and place on parchment paper to set for 15-20 minutes.

This Peanut Butter Rice Krispy Treats recipe was adapted from The Country Cook‘s original recipe, found here.

I love adding these Peanut Butter Rice Krispy Treats to themed dessert boards! Check out my tips to make a great treat board here!

Let me know if you plan to try these and what color sprinkles you’ll use in the comments below! Follow me on Instagram or TikTok for more fun ideas for the family!

XO Maggie

AFFILIATE DISCLOSURE: Some of this post contains affiliate links for the products I use and LOVE. If you take action on these links (like clicking, buying, etc.), I may receive compensation at no cost to you. As always, all opinions are my own, and I’ll only recommend what I truly love. For more information about affiliates and your privacy, view our Terms & Conditions page here.

How To Make A Holiday Treat Board

Cooking, Holidays, Kitchen, Lifestyle

I love hosting a good themed party, so a holiday themed treat board is right up my alley! I’ve recently created two treat boards for St. Patrick’s Day and Easter, and I’m having so much fun that I can’t wait to make more for future holidays, birthdays and other celebrations! The best part? They’re SO EASY! Much easier than intricate charcuterie boards!

St. Patrick’s Day Charcu-TREAT Board!

To Love or Hate Charcuterie Boards? Beautiful charcuterie boards have been trending for a couple years now, and as someone who loves entertaining, I couldn’t help but jump on the charcuterie board bandwagon! Who can resist a decadent board of fine cheeses, quality meats, and all the yummiest snack pairings and accompaniments?! Plus, these boards are gorgeous to admire and make for the perfect photo-worthy party centerpiece!

I’ve loved putting together charcuterie boards for gatherings, but during our last family-friendly party at our house, I realized that the process can often be more time consuming than I’d like. Slicing the cheeses, arranging the board, thoughtfully considering the correct salty-to-savory-to-sweet pairings… I was getting a little bogged down by the process. Plus, if you choose high-quality meats and cheeses, a charcuterie board, which is often viewed as an appetizer, can cost as much as cooking a group dinner! During our party, guests hovered around the charcuterie board (score!), took photos of it, and snagged bites in between socializing and chasing their kiddos in and out of our backyard. At the end of the party, I noticed that no one hardly touched the honeycomb, dried fruit or olives, and what was left of the cheeses and meats had been sitting out for hours and not worth saving. Only a few of the children ate some cheese and crackers, but most of them didn’t have a palette for bold Roquefort yet. My charcuterie board was beautiful for the adults… but was it worth it?

Enter the charcu-TREAT board!! For St. Patrick’s Day this year, I decided to try something a little different… A dessert board! And, boy, did I have fun getting creative with this one! I went to my favorite spots for holiday treats – See’s Candies and Target – and pulled together a fruit and dessert board reminiscent of a rainbow and gold. Like a traditional charcuterie board, it was the center of the party, but this time it got eaten!! It cost me half the price of what it would to put together a fancy cheese board and was more festive for St. Paddy’s Day than charcuterie! Now, treat boards are a trend I can stand FIRMLY behind!

Easter Treat Board

Tips for Putting Together a Charcu-TREAT Board:

  1. Choose a large board – You can use a classic cheese board in a rectangle or round shape, or choose a tray to keep the treats from rolling off your board. Holiday themed serving platters, like this Easter platter, makes the treat board extra fun and festive!
  2. Pick a color scheme – This is easy for holidays, like St. Patrick’s Day, Easter, Fourth of July, Halloween and Christmas. For other celebrations, have the treat board match your party decor colors. For example, if you’re hosting a Spiderman themed kids birthday, look for red, blue and black candies and sweet snacks.
  3. Incorporate party decor – To add some festive flair and help fill space on your board, incorporate leftover decor that you’re already using for the party. For example, I used Easter grass on my Easter board. You also could add a porcelain bunny!
  4. Choose a variety of candies, chocolate and sweet snacks – Candies could include jelly beans, sour straws, gummy bears; Chocolate could include M&Ms, wrapped chocolates, chocolate covered almonds; Sweet snacks can include fruit, cookies, rice crispy treats, or chocolate dipped pretzels, cookies.
  5. Have one or two homemade items – One of the benefits of a treat board is little to no prep work, but to make the boards special, I like to add one or two homemade items, like chocolate dipped rice crispy treats or cookies in cutout shapes that fit the theme of the party.
  6. Utilize small bowls – Make the board interesting by incorporating two or three bowls filled with candy. This also is a good way to corral smaller candies into one place.

Steps to Put Together a Treat Board:

  1. Gather a board and 2-3 small bowls, along with sweets, treats and decor you wish to use for your board.Ideas for boards, candy, chocolate and sweet snacks are listed at the bottom of this post!
  2. Place the small bowls and whatever else you want to be the centerpiece on your board. For example, on the Easter board, I put the small bowls and the chocolate Easter bunny on the board first. For the St. Patrick’s Day board, I made the fruit rainbow first.
  3. Add larger items, like cookies, brownies, rice crispy treats, etc. Arrange them in fun ways to add visual interest, like rows, fanned, or a pattern. These larger items are also great for creating barriers for the smaller items to stay in place on the board.
  4. Fill in the rest of the board with smaller treats, like jelly beans, marshmallows and M&Ms, and pay attention to color distribution.
  5. Add small spoons to bowls and offer small plates or cups next to the board for guests to take their favorite treats with them!

Voila! Kids and adults alike will go nuts over a fun themed treat board!

Board Ideas:

  1. West Elm Mixed Marble & Wood Preston Cheese Boards – Feel fancy with marble!

2. Williams Sonoma Boska Oak Rectangular Cheese Board Medium – A classic, gorgeous oak board!

3. Pottery Barn Connor Ash Wood Tray – I like to use trays with edges to keep all the treats in one place. This makes the board easier to move, if needed, without candies rolling off the sides.

4. Texas Shaped Catskill Craftsmen, Inc. Wood Cutting Board – A board in the shape of your state could be great for any gathering!

5. Threshold Wood Bunny Serving Board – How fun would this be for a special Easter treat board!

Board Accessories Ideas:

  1. West Elm Minimal White Ramekins – I love these ramekins to add a modern look to the treat board.

2. Pottery Barn Hammered Nut Bowl – A gorgeous bowl for smaller treats!

3. Libbey Small Glass Bowls with Lids – Corral smaller treats into these easy, inexpensive bowls!

4. CB2 Gold Cocktail Spoons – Gorgeous gold spoons really elevate the board. Use these for guests to scoop up little treats, like M&M’s and marshmallows.

5. Stainless Steel Mini Spoons – Add some drama with black stainless steel!

Homemade Treat Ideas:

Store Bought Treat Ideas:

I’d love to hear your ideas for future treat boards! Share your favorite treat board goodies or theme ideas in the comments below! Be sure to follow me on Instagram and TikTok for more fun family-friendly ideas!

XO Maggie

AFFILIATE DISCLOSURE: Some of this post contains affiliate links for the products I use and LOVE. If you take action on these links (like clicking, buying, etc.), I may receive compensation at no cost to you. As always, all opinions are my own, and I’ll only recommend what I truly love. For more information about affiliates and your privacy, view our Terms & Conditions page here.

Best Banana Zucchini Bread Muffins Recipe!

Cooking, Health & Wellness, Home, Kitchen, Lifestyle

Hey Mamas! If you’re like me and have picky eaters in your house, it can be a struggle to get kids to eat green vegetables! My solution: Sneak veggies into their favorite foods!

Great for picky eaters: I have THE BEST banana bread recipe (originally adapted from Delish.com) that I’ve converted into muffins with hidden zucchini! My kids have never once said, “Ewe,” “What’s the green stuff?” or “I can taste vegetables!” when I serve them these muffins! SCORE!

Why this is the best Banana Zucchini Bread Muffin recipe: When I say this is the best banana bread recipe, I truly mean it! During the pandemic, I made one banana bread loaf for every month we were locked down in LA County. I tried six variations of banana bread, so I can attest that this is the very best recipe! Utilizing three bananas is the perfect amount of flavor and sweetness, and the full fat sour cream makes the bread so moist! You will never need to try another banana bread recipe again… This is IT! You’re welcome.

Original recipe swaps: I make a couple swaps for these Banana Zucchini Bread Muffins from the original Banana Bread Recipe from Delish.com to make them kid-friendly and mom-approved. First, I add half of a grated zucchini. Secondly, I add mini semi-sweet chocolate chips! My kids go nuts over chocolate anything, so this is a special treat. In my opinion, regular sized chocolate chips overpower the the banana flavor, so I prefer to use mini sized chips. I haven’t tried the muffin recipe without the mini semi-sweet chocolate chips yet, but I have made the original loaf recipe without them, and it was still soooo gooood!

Make it even healthier!: Recently, I completed a 5-day wellness reset that eliminated sugar, gluten and dairy from my diet, and I saw some phenomenal health benefits (like my average resting heart rate dropping by 9 heartbeats per minute – wow!). Since then, I’ve been testing swapping out sugar and gluten in some of my favorite recipes, like this one! If you want to go gluten- or sugar-free, try Bob Mills Gluten Free All Purpose Baking Flour and Truvia Sweet Complete Monk Fruit Sweetener. I could not tell the difference when we made these swaps! So good!

Mix-ins and frosting ideas: If you want to add some more oomph to this recipe, add 1/2 cup chopped nuts (pecans and walnuts are my favorite) or coconut! Or, add a cream cheese frosting for a real decadent treat that’s totally approved by the health food gods because we’re already eating zucchini – LOL! My favorite is a vegan cream cheese frosting recipe from Peanut Butter & Jilly found here.

I prefer using mini chocolate chips in this banana zucchini bread recipe!

Tips for the best Banana Zucchini Bread Muffins:

  • You can’t have bananas that are too ripe for this recipe. The more ripe, the better!
  • Shred the zucchini with a VERY fine grater. You don’t want chunky zucchini in your muffins!
  • Be sure to drain and soak the moisture from the grated zucchini with a paper or cloth towel. Do not skip this step of the recipe or else you’ll have watery batter!
  • This recipe makes about 18 muffins, so I always give a few to our neighbors and teachers. Everyone will love these muffins!

Can you convert muffins into bread loaves? Yes! To be honest, my most favorite way to make this recipe is a large 9×5 loaf pan instead of muffins. However, my kids love the muffins and they’re much easier to transport and serve to kids in muffin form.

How to Make One Banana Zucchini Bread Loaf:

  • Preheat oven to 350º. Line a 9×5-inch loaf pan with parchment and grease with cooking spray.
  • Follow recipe as written below, but bake for 1 hour instead of 25 minutes. Let bread cool for at least 10 minutes before serving.

How To Make Multiple Mini Banana Zucchini Bread Loaves:

  • Preheat oven to 350º. Line four  3.8×2.5-inch loaf pans with parchment and grease with cooking spray.
  • Follow recipe as written below, but bake for 30-35 minutes. Keep an eye on it, as all ovens cook at different speeds. Let bread cool for at least 10 minutes before serving.

BANANA ZUCCHINI BREAD MUFFINS

Yields: 18 Muffins | Prep Time: 15 minutes | Total Time: 40 minutes

Ingredients:

*Note: Some people like to add Xanthum Gum to their recipes using gluten free flour, but I don’t believe it’s totally necessary if you’re making muffins. The label on Bob Mills Gluten Free Flour has instructions on how much Xanthum Gum to add if you wish to try it.

Directions:

  1. Preheat oven to 375º. Line two muffin pans with 18 baking cups.
  2. In a large bowl, whisk together flour, baking soda, and salt.
  3. In another large bowl, mix together melted butter, sugar, egg and egg yolk, sour cream, and vanilla. Add mashed bananas and grated zucchini and stir until combined. Gradually add dry ingredients to wet ingredients until just combined. 
  4. Fold in mini chocolate chips and transfer to prepared muffin pan cups.
  5. Bake until a toothpick comes out clean, about 25 minutes. Let cool 10 minutes in pan, then turn out onto a cooling rack to cool completely.

I’d love to hear what you think of this recipe! I’ve had so much fun making (and eating!) these Banana Zucchini Bread Muffins that I’m determined to add zucchini to other favorite recipes! What should I try next: a chocolate-zucchini cake, blueberry-zucchini muffins or chocolate chip-zucchini cookies?! Let me know in the comments below, or connect with me on Instagram or TikTok!

AFFILIATE DISCLOSURE: Some of this post contains affiliate links for the products I use and LOVE. If you take action on these links (like clicking, buying, etc.), I may receive compensation at no cost to you. As always, all opinions are my own, and I’ll only recommend what I truly love. For more information about affiliates and your privacy, view our Terms & Conditions page here.

Chocolate Peanut Butter Pecan Cookies – My Favorite Easy Cookie Recipe With Only 5 Ingredients!

Holidays, Kitchen, Lifestyle

‘Tis the season for holiday baking!

Baking these easy cookies with my son!

During the holidays when I was growing up, the kitchens of the women in my family were always filled with fresh baked goodies. I guess that’s why when Dec. 1 rolls around, I get an itch my bones to start baking! I especially love baking my grandmothers’ recipes to honor their tradition. After sharing a couple treats with our family, my favorite thing to do is box up the goodies to share with neighbors as a holiday gift. It’s been a great activity to do with my toddler, too! He loves helping me in the kitchen, and he also gets to experience the joy of giving a homemade gift to people we care about.

As I’ve chatted with a few of my mom friends the last couple of holiday seasons, it’s come to my attention that the tradition of holiday baking is slowly dying. We either don’t want easily accessible sugar tempting us in our kitchens, don’t have the time to bake, or simply don’t have the interest!

Then comes along that one person in your office or friend group who suggests a holiday cookie exchange… Or, your friend last-minute asks you to bring a homemade treat to share at her holiday party… Or, you need a quick thoughtful gift for a child’s teacher or a special person on your gift list you accidentally forgot to shop for…

Don’t worry, girl, I got you with this SUPER EASY Chocolate Peanut Butter Pecan Cookies recipe!! It’s made with only 5 ingredients and takes around 20 minutes to make! Yummy crunchy peanut butter, chocolate chips, chopped pecans, sugar and eggs are what it takes to make these gooey, loaded cookies! And, these cookies taste SO GOOD that people will think you’ve slaved in the kitchen for hours making them from scratch… But, only you and I know that it only took 20 minutes!

My Grandmother Holmes always had these at her house around Christmastime. Every year, the day after Christmas, we would drive from Texas to go visit her in Tennessee and stay with her for several days. Our family always enjoyed snacking on these cookies at her home, so my mother got her recipe and I’ve been baking them every holiday season since! I’ll also make them a couple other times throughout the year for quick “I’m thinking of you” gifts – great for new mamas (did anyone else get a sweet tooth right after giving birth?), get-well-soon gifts, and simple thank-you’s!

Another pro about these cookies – they’re gluten-free! I like to convince myself they’re healthier gluten-free, so I can have two instead of just one! ‘Tis the season, right?!

Chocolate Peanut Butter Pecan Cookies

RECIPE: Chocolate Peanut Butter Pecan Cookies

These flavorful cookies are gooey and loaded with crunchy peanuts and pecans! The sweetness from the semi-sweet chocolate chips make them perfect for a holiday treat – or anytime!

Prep Time: 5 minutes | Cooking Time: 12-15 minutes | Total Time: 20 minutes

Makes around 22-24 cookies

Ingredients:

-2 eggs blended

-1 cup sugar

-1 cup crunchy peanut butter

-1 cup chopped pecans

-1 cup chocolate chips (I like to use Ghirardelli Semi-Sweet Premium Chips)

Directions:

  1. In a large bowl, mix together eggs and sugar until combined.
  2. Stir in peanut butter, chips and nuts.
  3. Drop by tablespoon on parchment paper lined cookie sheet.
  4. Bake at 350 degrees for 12-15 minutes until edges are brown
  5. Cool and serve.

Put a few cookies in these festive treat bags with a Christmassy bow to share with neighbors, teachers, the mailman, friends, family, everybody!

Don’t forget to *kiss the cook!*

Let me know if you plan to make these cookies by commenting below or connecting with me on Instagram!

Happy Holidays!

XO Maggie

Yummy Gooey Crunchy Chocolate Peanut Butter Pecan Cookies!

AFFILIATE DISCLOSURE: Some of this post contains affiliate links for the products I use and LOVE. If you take action on these links (like clicking, buying, etc.), I may receive compensation at no cost to you. As always, all opinions are my own, and I’ll only recommend what I truly love. For more information about affiliates and your privacy, view our Terms & Conditions page here.