Homemade Chewy Chocolate Chip Granola Bars: Nut-Free and Gluten-Free!

Cooking, Kitchen, Lifestyle

Chewy chocolate chip granola bars were one of my favorite snacks growing up, and now it’s one of my children’s favorite foods!

The current back-to-school season brings me so much nostalgia for these nourishing granola bars, as I vividly remember reaching for these bars in between school and sports practice or being excited when I found one in my lunchbox packed by my mother.

Homemade Chewy Chocolate Chip Granola Bars taste better than the packaged name-brand bars!

As I got older, I phased out on snacking on them and eating most pre-packaged snacks in general for the health benefits of eating more whole foods.

When I became a mom, my kids starting requesting for me to buy more granola bars at the grocery store. I was happy to see them delight in the same snack that I loved when I was a kid, but I couldn’t help but be curious about the ingredients in them. I was shocked to see that our favorite chocolate chip granola bars have around 26 ingredients listed on the wrapper, including tons of processed ingredients like sugar, brown sugar, corn syrup, corn syrup solids, sorbitol, soybean oil and “natural flavor” (whatever that is!).

Determined to create my own homemade version of our favorite chewy chocolate chip granola bars, I found this recipe from Love and Lemons that uses only seven simple ingredients! I took it a step further and made this recipe with nut-free ingredients, so my kids can easily take them to school!

Not only do my kids love these granola bars, my husband and I enjoy snacking on them, too! I actually think they taste better than the brand-name packaged bars! They’re so chewy and naturally sweet! These bars have become our easy go-to for after-school snacks and quick breakfasts when we’re short on time!

Homemade Chewy Chocolate Chip Granola Bars

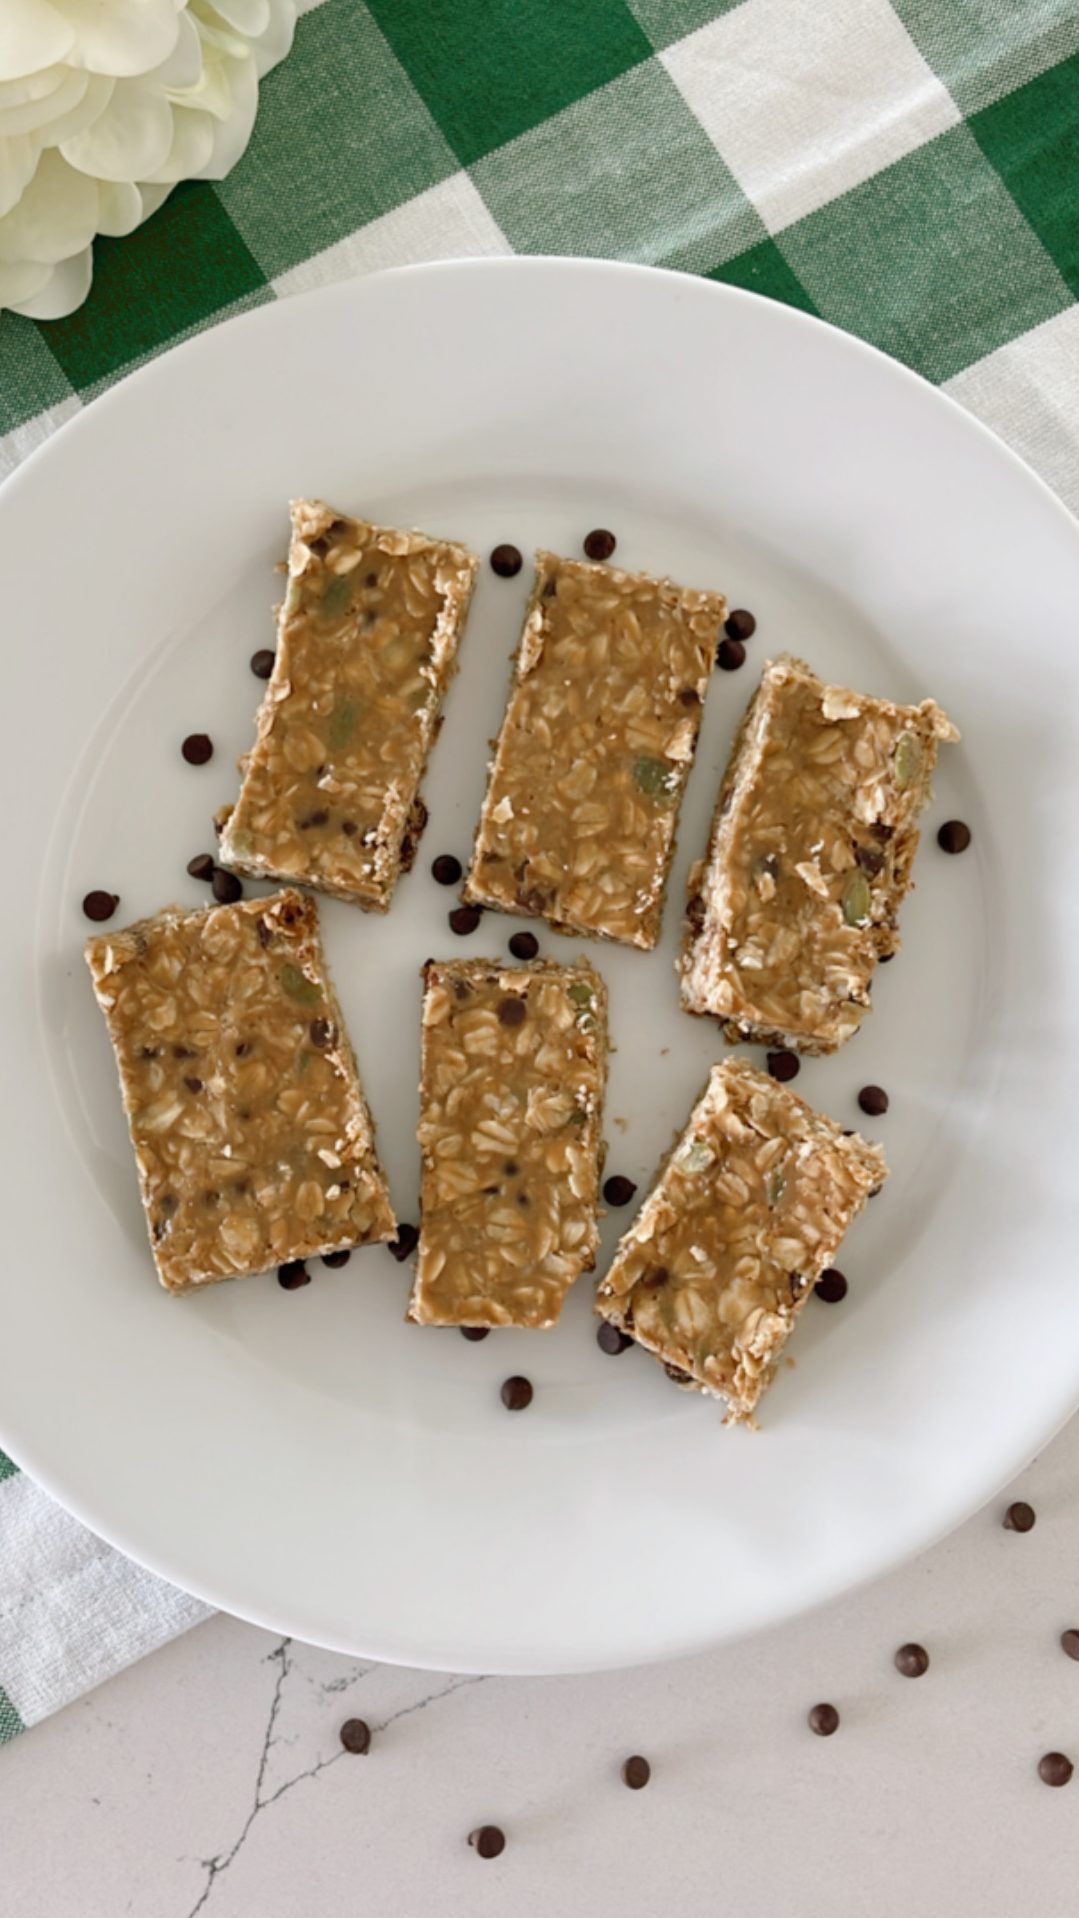
Scroll to the bottom of the page for this easy Homemade Chewy Chocolate Chip Granola Bars recipe!

What You Need to Make Homemade Chewy Chocolate Chip Granola Bars

Tools & Equipment:

  • One 8×8 baking pan or pyrex dish – You’ll use this baking pan or dish to set and cool the granola bars in the fridge. A baking pan is preferred, but I’ve used pyrex dishes, too. If you use a pyrex dish, the granola bar mix may not all lay flat and the edges may turn up.
  • One large mixing bowl – I used my largest glass mixing bowl to stir all the ingredients together.
  • Measuring cups – Specifically, you’ll need 1 cup (250 ml), 1/2 cup (125 ml), 1/3 cup (80 ml), 1 Tbsp (15 ml) and 1 Tsp (5 ml).
  • Parchment Paper – I cut 2 pieces of parchment paper to fit the size of my 8×8 baking pan for setting and cooling the granola bars.
  • Cling wrap – Cover the granola bars as they cool with Glad Press’N Seal Wrap. You can also use the cling wrap to cover the granola bars to keep them fresh for the week. I’m obsessed with Glad Press’N Seal and use it in my kitchen all the time.
Homemade Chewy Chocolate Chip Granola Bars are made with only 7 simple ingredients!

Ingredients:

  • Natural Sunflower Seed Butter – I didn’t discover sunflower seed butter until I had to find an alternative for peanut butter for my son’s PB&J sandwiches for school. Most schools these days are nut-free. My son is such a picky eater and basically only eat PB&J sandwiches, so I was very nervous about whether he’d like the new seed butter. I’m happy to report that this SunButter sunflower seed butter is a hit! He’s never mentioned it tasting any different compared to regular peanut butter. In fact, I think he likes it more than peanut butter! For this recipe, make sure you use the natural sunflower seed butter because it’s more runny. The runnier the seed butter, the easier it will be to mix!
  • Honey – Almost any honey will do, but I prefer organic, raw and unfiltered for health benefits. Target’s Good & Gather Honey is good.
  • Vanilla Extract – This is a staple in my kitchen, as I use it for so many recipes! Rodelle Pure Vanilla Extract is a great, sustainable brand with only 3 ingredients and no sugar.
  • Sea Salt – Another easy staple in my kitchen! Can’t go wrong with classic Morton’s Sea Salt.
  • Rolled Oats – I discovered Bob’s Red Mill Gluten Free Organic Rolled Oats after I had children and started making more oatmeal, muffins and cookies from scratch. There’s no better brand! I’ve even started mixing them in smoothies to add more nutrients to my kids’ diet!
  • Mini Chocolate ChipsEnjoy Life Mini Chocolate Chips are the best to use if you’re concerned about nut and gluten allergies. My kids love them, so I’ll sneak a couple plain ones in their lunchboxes for a sweet treat.
  • Pepitas or Pumpkin Seeds – Pepitas are a type of pumpkin seed that I love tossing in salads, smoothies and granola. These Target brand pumpkin seeds are delicious and nut-free, so they’re school-friendly! I also like to buy the raw pepitas in bulk at Whole Foods, which would work perfectly for this recipe.

How to Make Nut-Free, Gluten Free Chewy Chocolate Chip Granola Bars

With the appropriate kitchen tools and ingredients on-hand, any novice chef can make these simple homemade Chewy Chocolate Chip Granola Bars! Here’s what to do:

  1. Prep your pan: Line your baking pan with parchment paper.
  2. Stir wet ingredients: Combine the seed butter, vanilla extract, honey and salt in a large mixing bowl. Stir very well!
  3. Mix dry ingredients: Fold in the rolled oats, mini chocolate chips and pepitas. The mixture will appear very dry, but keep stirring until it’s well combined.
  4. Make the bars: Scoop the mix into the parchment-lined dish and firmly press to the sides of the pan. Add another piece of parchment paper on top of the mixture and use the back of a large measuring cup to continue to flatten the top of the bars.
  5. Chill the bars: Cover the bars with cling wrap or foil, and transfer to the refrigerator to chill for one hour. It’s very important to let the bars fully chill for at least one hour; otherwise, they won’t stick together!
  6. Enjoy: Remove bars from the refrigerator, slice into bars, and enjoy! Store in an airtight container in the refrigerator or freezer to snack on these bars all week!
This is what the granola bar mixture will look like before adding to the pan!

Tips and Suggestions for Better Homemade Chewy Chocolate Chip Granola Bars

These homemade Chewy Chocolate Chip Granola Bars are already so easy to make, but here’s some tips to make whipping up a batch of these bars even easier:

  1. Use natural sunflower seed butter – The natural butters are usually the runniest, which will make stirring so much easier!
  2. Don’t cut the chill time short – I know you’re eager to taste these yummy treats, but please keep them in the refrigerator at least for one hour so you’re able to properly slice the bars without crumbling apart.
  3. Store in fridge or freezer – Because these bars are made with simple, natural ingredients, they need to be kept in the fridge or freezer to keep them fresh and from crumbling. I like to store them in an airtight container separated by parchment paper so they don’t stick together. You can eat them right out of the fridge. If you’re packing them for school, it’s best to add a cool pack in the lunchbox. If you’re storing them in the freezer, allow them to thaw for about 20-30 minutes before eating. The bars will keep for one week in the fridge and two months in the freezer.
  4. Only use mini chips – Regular sized chocolate chips are too large for the mixture to stick together. If you can’t find mini chocolate chips at the store, cut the regular sized chips into smaller pieces.
  5. Try other nut butters – If you’re concerned with allergies or prefer nut butters, you don’t have to use sunflower seed butter! This original recipe from Love & Lemons is made with natural peanut butter, and it’s very delicious!
  6. Switch up your mix-ins – We keep it simple with mini chocolate chips and pepitas, but feel free to swap in your favorite ingredients! Raisins, dried currants, dried cranberries, crushed peanuts or crushed almonds are really great options! For a sweet swap, trade the mini chocolate chips for mini white chocolate or dark chocolate chips, or try peanut butter chips! Yum!

Below is the simplest recipe for Homemade Chewy Chocolate Chip Granola Bars! Don’t forget to save this recipe to Pinterest!

Recipe: Homemade Chewy Chocolate Chip Granola Bars (Nut-Free and Gluten-Free)

Ingredients:

Instructions:

  1. Line 8×8 baking pan or pyrex dish with parchment paper.
  2. In a large bowl, stir together peanut butter, honey, vanilla extract and salt.
  3. Mix in the rolled oats, mini chocolate chips and pepitas. Stir until well combined.
  4. Press mixture into baking pan. Place a second piece of parchment paper on top of mixture and use a large measuring cup to press the mixture firmly to the pan and flatten. Cover pan with foil or cling wrap and chill in refrigerator for at least one hour.
  5. Remove from fridge, slice into bars and enjoy! Store bars in refrigerator for one week or freezer for two months.

Did you try this recipe? I’d love to hear what you think! Let me know if you tried other mix-ins, like crushed peanuts, raisins or white chocolate, too!

For more easy recipes and lifestyle tips, be sure to follow me on Instagram and TikTok!

XO Maggie

AFFILIATE DISCLOSURE: Some of this post contains affiliate links for the products I use and LOVE. If you take action on these links (like clicking, buying, etc.), I may receive compensation at no cost to you. As always, all opinions are my own, and I’ll only recommend what I truly love. For more information about affiliates and your privacy, view our Terms & Conditions page here.

Easy July 4th Dessert: Red, White and Blue Fruit Skewers!

Cooking, Holidays, Kitchen, Lifestyle
Festive in Red, White and Blue!

The Fourth of July is my favorite holiday! It’s the best of summer all rolled into one day — family, friends, BBQ, parties, yummy treats, fun drinks, great music, and fireworks!

We’re hosting our first big Fourth of July party at our house this year, and it’s a party I’ve been dreaming of hosting ever since we bought this home almost five years ago! We finally finished our backyard remodel last fall, and I can’t wait for everyone to enjoy our pool and great view of fireworks from our balcony this year!

If you’ve been following me for a while, you know that I love cooking and hosting parties. But, when it comes to hosting a really big party, like we are this year for July 4th, I’m all about making dishes that are simple, quick, and festive! That’s why I look for easy recipes that can feed a crowd but look fun to eat, too!

Enter: Red, White and Blue Fruit Skewers!

Easy Red, White and Blue Fruit Skewers

Because beautiful red strawberries and sweet blueberries are in season, it’s easy to add patriotic color to your July 4th party table. I love these Red, White and Blue Fruit because they’re fun to make AND eat! Your kids will love helping you assemble them! Just make sure they’re old enough to handle a wooden skewer without poking themselves! I love the mini marshmallows in this recipe because they instantly upgrade your treat from a simple fruit skewer to a dessert!

Ingredients for Red, White and Blue Fruit Skewers: Strawberries, Blueberries, Mini Marshmallows and Wooden Skewers

Here’s how to make Red, White and Blue Fruit Skewers!

Red, White and Blue Fruit Skewers Recipe:

Ingredients:

Directions:

  • Wash and dry strawberries and blueberries
  • Cut strawberries to match the size of blueberries and mini marshmallows
  • Thread berries and marshmallows onto skewer in red, white and blue pattern
  • Cover and store in fridge until ready to serve. Enjoy within 24 hours.
Red, White and Blue Fruit Skewers for the Fourth of July!

Other Ideas for July 4th Fruit Skewers:

  • Swap out mini marshmallows for bananas or angel food cake
  • Try other blackberries or raspberries instead of blueberries and strawberries
  • Use mini star shaped cookie cutters to make festive shapes out of the strawberries or angel food cake

Let me know if you try these skewers, and please share other fun July 4th dessert recipes with me! Be sure to follow me on Instagram and TikTok for more ideas!

AFFILIATE DISCLOSURE: Some of this post contains affiliate links for the products I use and LOVE. If you take action on these links (like clicking, buying, etc.), I may receive compensation at no cost to you. As always, all opinions are my own, and I’ll only recommend what I truly love. For more information about affiliates and your privacy, view our Terms & Conditions page here.

Best Banana Zucchini Bread Muffins Recipe!

Cooking, Health & Wellness, Home, Kitchen, Lifestyle

Hey Mamas! If you’re like me and have picky eaters in your house, it can be a struggle to get kids to eat green vegetables! My solution: Sneak veggies into their favorite foods!

Great for picky eaters: I have THE BEST banana bread recipe (originally adapted from Delish.com) that I’ve converted into muffins with hidden zucchini! My kids have never once said, “Ewe,” “What’s the green stuff?” or “I can taste vegetables!” when I serve them these muffins! SCORE!

Why this is the best Banana Zucchini Bread Muffin recipe: When I say this is the best banana bread recipe, I truly mean it! During the pandemic, I made one banana bread loaf for every month we were locked down in LA County. I tried six variations of banana bread, so I can attest that this is the very best recipe! Utilizing three bananas is the perfect amount of flavor and sweetness, and the full fat sour cream makes the bread so moist! You will never need to try another banana bread recipe again… This is IT! You’re welcome.

Original recipe swaps: I make a couple swaps for these Banana Zucchini Bread Muffins from the original Banana Bread Recipe from Delish.com to make them kid-friendly and mom-approved. First, I add half of a grated zucchini. Secondly, I add mini semi-sweet chocolate chips! My kids go nuts over chocolate anything, so this is a special treat. In my opinion, regular sized chocolate chips overpower the the banana flavor, so I prefer to use mini sized chips. I haven’t tried the muffin recipe without the mini semi-sweet chocolate chips yet, but I have made the original loaf recipe without them, and it was still soooo gooood!

Make it even healthier!: Recently, I completed a 5-day wellness reset that eliminated sugar, gluten and dairy from my diet, and I saw some phenomenal health benefits (like my average resting heart rate dropping by 9 heartbeats per minute – wow!). Since then, I’ve been testing swapping out sugar and gluten in some of my favorite recipes, like this one! If you want to go gluten- or sugar-free, try Bob Mills Gluten Free All Purpose Baking Flour and Truvia Sweet Complete Monk Fruit Sweetener. I could not tell the difference when we made these swaps! So good!

Mix-ins and frosting ideas: If you want to add some more oomph to this recipe, add 1/2 cup chopped nuts (pecans and walnuts are my favorite) or coconut! Or, add a cream cheese frosting for a real decadent treat that’s totally approved by the health food gods because we’re already eating zucchini – LOL! My favorite is a vegan cream cheese frosting recipe from Peanut Butter & Jilly found here.

I prefer using mini chocolate chips in this banana zucchini bread recipe!

Tips for the best Banana Zucchini Bread Muffins:

  • You can’t have bananas that are too ripe for this recipe. The more ripe, the better!
  • Shred the zucchini with a VERY fine grater. You don’t want chunky zucchini in your muffins!
  • Be sure to drain and soak the moisture from the grated zucchini with a paper or cloth towel. Do not skip this step of the recipe or else you’ll have watery batter!
  • This recipe makes about 18 muffins, so I always give a few to our neighbors and teachers. Everyone will love these muffins!

Can you convert muffins into bread loaves? Yes! To be honest, my most favorite way to make this recipe is a large 9×5 loaf pan instead of muffins. However, my kids love the muffins and they’re much easier to transport and serve to kids in muffin form.

How to Make One Banana Zucchini Bread Loaf:

  • Preheat oven to 350º. Line a 9×5-inch loaf pan with parchment and grease with cooking spray.
  • Follow recipe as written below, but bake for 1 hour instead of 25 minutes. Let bread cool for at least 10 minutes before serving.

How To Make Multiple Mini Banana Zucchini Bread Loaves:

  • Preheat oven to 350º. Line four  3.8×2.5-inch loaf pans with parchment and grease with cooking spray.
  • Follow recipe as written below, but bake for 30-35 minutes. Keep an eye on it, as all ovens cook at different speeds. Let bread cool for at least 10 minutes before serving.

BANANA ZUCCHINI BREAD MUFFINS

Yields: 18 Muffins | Prep Time: 15 minutes | Total Time: 40 minutes

Ingredients:

*Note: Some people like to add Xanthum Gum to their recipes using gluten free flour, but I don’t believe it’s totally necessary if you’re making muffins. The label on Bob Mills Gluten Free Flour has instructions on how much Xanthum Gum to add if you wish to try it.

Directions:

  1. Preheat oven to 375º. Line two muffin pans with 18 baking cups.
  2. In a large bowl, whisk together flour, baking soda, and salt.
  3. In another large bowl, mix together melted butter, sugar, egg and egg yolk, sour cream, and vanilla. Add mashed bananas and grated zucchini and stir until combined. Gradually add dry ingredients to wet ingredients until just combined. 
  4. Fold in mini chocolate chips and transfer to prepared muffin pan cups.
  5. Bake until a toothpick comes out clean, about 25 minutes. Let cool 10 minutes in pan, then turn out onto a cooling rack to cool completely.

I’d love to hear what you think of this recipe! I’ve had so much fun making (and eating!) these Banana Zucchini Bread Muffins that I’m determined to add zucchini to other favorite recipes! What should I try next: a chocolate-zucchini cake, blueberry-zucchini muffins or chocolate chip-zucchini cookies?! Let me know in the comments below, or connect with me on Instagram or TikTok!

AFFILIATE DISCLOSURE: Some of this post contains affiliate links for the products I use and LOVE. If you take action on these links (like clicking, buying, etc.), I may receive compensation at no cost to you. As always, all opinions are my own, and I’ll only recommend what I truly love. For more information about affiliates and your privacy, view our Terms & Conditions page here.

Non-Candy Halloween Treats

Health & Wellness, Home, Kitchen, Lifestyle, Mom & Baby

Blake’s Seed Based Rice Crispy Treats are a yummy (and healthy!) treat for the whole family!

First of all, I know many of you may have read the headline for this blog post and rolled your eyes… Look, I’m a kid who grew up in the late ’80s and ’90s (Gushers! Mountain Dew! Pop Tarts! Sugar on top of SUGAR!), and I promise you that I’m NOT ready to give up the tradition of genuine TREATS for Halloween! What is Halloween without candy, anyway?! But, as I review the holiday activities we have planned this month… WHOA… it’s major compared to when I was a kid! We don’t just have a class Halloween party and the classic trick-or-treating… We also have the pumpkin patch visit, the multi-family immersive Nights of the Jack experience, our local YMCA trunk-or-treat… and I’ve already said no to a few other local Halloween festivities that include kids getting treats! I realized that if we don’t take the time to be mindful of moderation, the candy exposure can get really out of hand!

So, here I am… being that annoying healthy mom that I used to roll my eyes at before I had kids. I assumed “her” kids drank kale smoothies for breakfast and their favorite treat was the olive bar at Whole Foods… Well, I’m here to tell you that my kids DO NOT drink kale smoothies for breakfast and my oldest wouldn’t touch an olive with a 9-foot pole. But, I do know that my kids can appreciate “treats” in forms other than candy, like nutrient-packed muffins, festive shaped foods and seasonal flavors!

I put together this list of non-candy Halloween treats for parents desiring to limit the candy craziness this year. Whether you want to create healthier habits for your family, dread the kids’ candy sugar high, or responsible for sending a non-candy treat to school for the class Halloween party, these non-candy Halloween treat ideas are great for parents who need an easy, individually wrapped goody this fall season! From pumpkin rice crispy treats to pumpkin dog treats, there’s something for the whole family to snack on and feel good about!

6 Non-Candy Halloween Treats for the Whole Family:

  1. Blake’s Seed Based Pumpkin Spice Rice Crispy Treats  

I have lots of memories around my mom making homemade rice crispy treats and purchasing the prepackaged cereal treats to put in my lunchbox as a kid. These are EVEN BETTER! Blake’s Seed Based Rice Crispy Treats come in many yummy flavors like strawberry, birthday cake, chocolate chips, and now PUMPKIN SPICE! Blake’s is the very first vegan rice crispy treat on the market, so it’s the perfect allergy-friendly trick-or-treat candy. They’re 90 calories, only have 7 grams of sugar, nut-free and gluten-free! If you live in Southern California like me, you can find Blake’s Seed Based Rice Crispy treats available in local Sprouts stores, or you can shop the snacks online at Amazon or on the company’s website.

Blake’s Seed Based Rice Crispy Treats are a perfect treat for Halloween!

2. Sensible Portions Garden Veggie Chips Ghosts & Bats   

We already eat Sensible Portions Garden Veggie Chips in our house as a better-for-you alternative to regular fried potato chips, so I was really excited that the brand came out with Halloween chips in spooktacular shapes! Sensible Portions Garden Veggie Chips Ghosts & Bats have the crispy crunch and flavor you want in a snack, but without all the artificial flavors and artificial preservatives that you don’t. The seasonal chips are packaged in individual-sized bags that are perfect for trick-or-treaters, classroom parties, or lunchbox treats. They are available in major retail stores across the nation, as well as online and Amazon, sold in individual bags or packs of 24.

My kids’ treat bags filled with Sensible Portions Veggie Chips Ghosts and Bats!

3. Bobo’s Pumpkin Spice Oat Bites  

I often get frustrated with store-bought muffins and snack bars, because the ingredients show that they may as well be cupcakes and candy bars! Not Bobo’s! The Bobo’s brand offers delicious, simple, handmade 100% whole grain oat bites and snacks and released a brand-new pumpkin spice flavor just in time for the holidays! The slow-burning oats give kids clean energy that won’t leave them with a crash, while satisfying their sweet tooth. Each bite is non-GMO, gluten-free and plant-based, and there’s a variety of flavors in addition to pumpkin spice, like apple pie, chocolate chip, coconut, lemon poppyseed and peanut butter & jelly! You can easily find them at your local Kroger flagship, Whole Foods Market, or Target and online at Amazon

4. Bare Baked Crunchy Apple Chips  

Nothing says fall like apple harvest season, which is the perfect reason to pass out Bare Baked Crunchy Apple Chips to trick-or-treaters!  Bare Baked Snacks are real apples baked into deliciously crunchy chips and never fried. The apple chips are non-GMO verified and have no added oils or preservatives. They’re sold at select retailers, or you can purchase in multi-packs online at Target and Amazon

5. Dole Mandarin Orange Jack-O-Lantern Fruit Cups  

Get a little crafty by turning Dole’s Mandarin Orange Fruit Cups into cute Jack-O-Lanterns! All you need is a black sharpie to draw a Jack-O-Lantern face on the cups! Bonus if you decide to add the green pipe cleaner for a stem! These are the perfect festive snack for a class party! Dole Fruit Bowls Mandarin Oranges in 100% Juice are made from the best sun-ripened fresh fruit that nature has to offer, and they’re non-GMO and naturally gluten free. Dole Fruit Bowls are available at all major grocery stores or you can get multipacks on Amazon.

6. Greenies Dental Treats, Pumpkin Spice Flavor  

If you want to share holiday treats with your furry family members or pass out treats to dogs trick-or-treating with kids, Greenies Dental Treats for dogs has launched a puppy-approved pumpkin spice flavor!  The unique texture of Greenies Dog Chews cleans down to the gumline to fight plaque and tartar and freshen breath. The treats are sold at Target, Amazon and Chewy.

Would you share these festive treats with your family? I’d love to hear what other better-for-you store-bought treats you pass out at Halloween! Please share with me in the comments below or connect with me on Instagram at @maggiehjackson!

AFFILIATE DISCLOSURE: Some of this post contains affiliate links for the products I use and LOVE. If you take action on these links (like clicking, buying, etc.), I may receive compensation at no cost to you. As always, all opinions are my own, and I’ll only recommend what I truly love. For more information about affiliates and your privacy, view our Terms & Conditions page here.

6 Healthy Halloween Snacks

Health & Wellness, Home, Kitchen, Lifestyle, Mom & Baby
6 healthy Halloween snacks that are easy and fun to make with your kids!

Got a picky eater? I’ve found the best way to get my kids to eat healthy is to get them involved in the kitchen with me! And, what better way to celebrate the spooky season than with fun Halloween inspired healthy treats! From green goblin smoothie bowls to spider crackers to boo-tiful mini cupcakes, these 6 snacks are so easy and fun to make! Plus, they’re too yummy not to eat! Your family will love spending time in the kitchen together this fall recreating these spook-tacular snacks!

I was so excited to feature these healthy Halloween snacks on KTLA Morning News with anchor Jessica Holmes, who’s a mom and food lover like me! Check out our video, below, for all the tricks to make these treats!

Watch me share Healthy Halloween Snack Ideas for Kids with KTLA Morning News Anchor Jessica Holmes!
Green Goblin Smoothie Bowls

Halloween Snack Idea #1: Green Goblin Smoothie Bowl

Adding spinach into smoothies is one of the easiest ways to get kids to eat their greens! And, you can’t taste the spinach – promise! For this Green Goblin Smoothie Bowl, make a green smoothie, pour into a small bowl, and have your kids toppings like granola or coconut for hair, dried fruit like raisins, dates or cranberries for the eyes, and pumpkin seeds or marshmallows for the smile. Kids have lots of fun decorating their green goblin face! 

Here is my favorite easy Green Smoothie recipe:

Ingredients:

  • 1 banana
  • 1 cup spinach
  • 1/2 cup frozen mango
  • 1/2 cup strawberries
  • 1 cup water (or almond milk or oat milk)

Instructions:

Place all ingredients into blender and blend until smooth. Enjoy immediately.

Peanut Butter Spider Crackers

Halloween Snack Idea #2: Spider Crackers

Have your kids help assemble these spooky spider crackers made with round crackers (I like Ritz Whole Wheat Crackers), pretzel sticks, peanut butter (or another nut or sunflower seed butter) or cream cheese, and small dried fruit, like raisins or blueberries. 

Ingredients:

  • Round crackers
  • Pretzel sticks
  • Peanut butter (or your preferred nut/sunflower seed butter) or spreadable cream cheese
  • Small dried fruit like raisins, blueberries, cranberries, or Wilton Edible Candy Eyeballs

Instructions:

  1. Spread nut butter or cream cheese on two crackers thick enough to hold pretzels
  2. Break 4 pretzels in half
  3. Place the 8 half pretzels sticks around one cracker to resemble spider legs
  4. Top the cracker with the second cracker to secure the legs and make a sandwich
  5. Dip 2 dried fruit pieces in the nut butter or cream cheese and stick them to the top of the spider cracker sandwich to resemble eyes
  6. Enjoy!
Clementine Pumpkins and Banana Ghosts

Halloween Snack Idea #3: Clementine Pumpkins and Banana Ghosts

These fruity treats are so easy to make and fun to eat! Peel clementines and cut celery into small sticks. Have kids add the celery sticks to clementines as stems to make pumpkins! Peel bananas and cut in half. Have your children add mini chocolate chips for the eyes and mouth to create ghosts!

Spooky Grilled Cheese

Halloween Snack Idea #4: Spooky Grilled Cheese

Turn everyone’s favorite lunch into a frightful treat with Halloween shaped cookie cutters and dark rye bread! You can use wheat or white bread, but the dark rye bread is much more spooky! Plus, my toddler surprisingly loves it! Because of its color, he calls it “chocolate bread,” even though it tastes nothing like chocolate! Your kiddo will have lots of fun using cookie cutters to make ghosts, bats and pumpkins in their bread, but I recommend leaving the stovetop cooking to parents!

Ingredients: (makes 1 grilled cheese)

  • 2 slices dark rye bread
  • 1-2 slices of pre-sliced cheddar cheese (depending on how cheesy you like your sandwich!)
  • Butter

Instructions:

  1. Melt butter over medium high heat in pan on stovetop.
  2. Take one slice of bread and use Halloween cookie cutter to cut shape into middle of bread. Butter one side of the bread cut-out bread.
  3. Take the other slice of bread and butter one side.
  4. Place both slices of bread in pan with the buttered side up.
  5. After cooking for a couple minutes and letting the bread get to your toasty preference, flip both sides of bread to cook the other side. Immediately place cheese on the slice of bread without the cut-out.
  6. Continue cooking until cheese is melty.
  7. Place cut-out side bread on top of cheese and press down so the cheese sticks the slices together.
  8. Serve and enjoy!
Creepy Eyes Cereal Bar

Halloween Snack Idea #5: Creepy Eyes Cereal Bars

Add funny eyes to pre-made cereal bars (or my favorite 3-ingredient cheerio bars seen here!) by rolling cream cheese into tiny little balls and adding a mini chocolate chips for eyes. If you’re low on time, it’s fun to add these eyes to anything pre-made, like muffins or frozen waffles!

Halloween Snack Idea #6: Green Halloween “Cupcakes”

My toddler loves these green “superpower” muffins, made with spinach, bananas, rolled oats and sweetened with honey! I love the ghastly green vibes of these for Halloween! Top with Nutella spread for “icing” and have your kids add Halloween sprinkles to make healthy-ish cupcakes! 

Which healthy Halloween snack do you want to try with your kiddos? Let me know in the comments below, or connect with me on Instagram @maggiehjackson!

XO, Maggie

AFFILIATE DISCLOSURE: Some of this post contains affiliate links for the products I use and LOVE. If you take action on these links (like clicking, buying, etc.), I may receive compensation at no cost to you. As always, all opinions are my own, and I’ll only recommend what I truly love.