Rice Krispy Treats are a classic childhood favorite! I wanted to make our homemade version more special than what you can get at the store, so I added peanut butter to the recipe and dipped them in chocolate! Make these Chocolate Dipped Peanut Butter Rice Krispy treats festive for a holiday or themed party by adding colored sprinkles. We made these treats for spring, so I used pink and blue sprinkles!
Spray an 9″x 13″ (or 8″x 8″ for thicker bars) casserole dish with nonstick cooking spray.
In a 4 quart sauce pan, melt butter on low heat. Do this slowly, you don’t want burned or brown butter here.
Once butter has melted, keep heat on low and add mini marshmallows.
Once marshmallows begin to soften and melt, add peanut butter.
At this point, you will need to constantly stir the mixture so the peanut butter does not burn and the marshmallows can evenly melt (won’t take too long, about 5 minutes or so).
Once, mixture is combined and melted, turn off heat and remove pan from stove.
Add Rice Krispy cereal to sauce pan and stir until evenly coated with mixture. This is sticky stuff so do your best to get it all combined.
Pour mixture into casserole dish (it will look very loose.) Spray your hand with some nonstick cooking spray and pat down the mixture until firmly compacted.
Allow 30-45 minutes for treats to set up. Cut into small squares or rectangles.
Melt white or dark melting wafers in a small bowl according to package instructions.
Dip one end of Rice Krispy treat into bowl of chocolate, top chocolate with sprinkles and place on parchment paper to set for 15-20 minutes.
This Peanut Butter Rice Krispy Treats recipe was adapted from The Country Cook‘s original recipe, found here.
I love adding these Peanut Butter Rice Krispy Treats to themed dessert boards! Check out my tips to make a great treat board here!
Let me know if you plan to try these and what color sprinkles you’ll use in the comments below! Follow me on Instagram or TikTok for more fun ideas for the family!
XO Maggie
AFFILIATE DISCLOSURE: Some of this post contains affiliate links for the products I use and LOVE. If you take action on these links (like clicking, buying, etc.), I may receive compensation at no cost to you. As always, all opinions are my own, and I’ll only recommend what I truly love. For more information about affiliates and your privacy, view our Terms & Conditions page here.
I love hosting a good themed party, so a holiday themed treat board is right up my alley! I’ve recently created two treat boards for St. Patrick’s Day and Easter, and I’m having so much fun that I can’t wait to make more for future holidays, birthdays and other celebrations! The best part? They’re SO EASY! Much easier than intricate charcuterie boards!
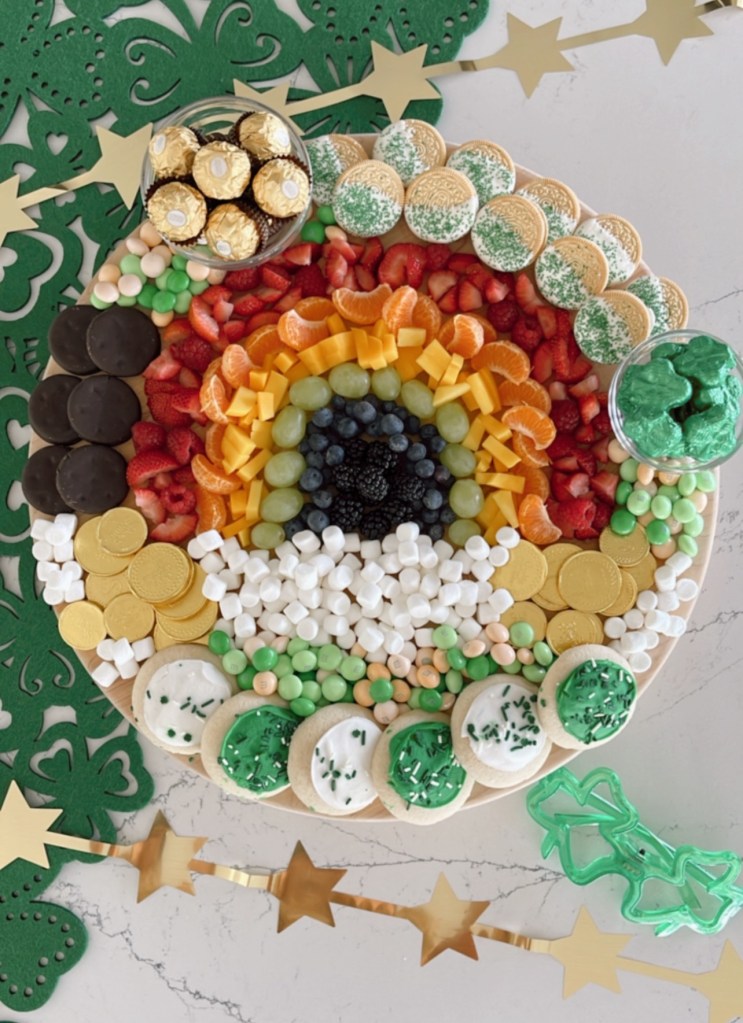
St. Patrick’s Day Charcu-TREAT Board!
To Love or Hate Charcuterie Boards? Beautiful charcuterie boards have been trending for a couple years now, and as someone who loves entertaining, I couldn’t help but jump on the charcuterie board bandwagon! Who can resist a decadent board of fine cheeses, quality meats, and all the yummiest snack pairings and accompaniments?! Plus, these boards are gorgeous to admire and make for the perfect photo-worthy party centerpiece!
I’ve loved putting together charcuterie boards for gatherings, but during our last family-friendly party at our house, I realized that the process can often be more time consuming than I’d like. Slicing the cheeses, arranging the board, thoughtfully considering the correct salty-to-savory-to-sweet pairings… I was getting a little bogged down by the process. Plus, if you choose high-quality meats and cheeses, a charcuterie board, which is often viewed as an appetizer, can cost as much as cooking a group dinner! During our party, guests hovered around the charcuterie board (score!), took photos of it, and snagged bites in between socializing and chasing their kiddos in and out of our backyard. At the end of the party, I noticed that no one hardly touched the honeycomb, dried fruit or olives, and what was left of the cheeses and meats had been sitting out for hours and not worth saving. Only a few of the children ate some cheese and crackers, but most of them didn’t have a palette for bold Roquefort yet. My charcuterie board was beautiful for the adults… but was it worth it?
Enter the charcu-TREAT board!! For St. Patrick’s Day this year, I decided to try something a little different… A dessert board! And, boy, did I have fun getting creative with this one! I went to my favorite spots for holiday treats – See’s Candies and Target – and pulled together a fruit and dessert board reminiscent of a rainbow and gold. Like a traditional charcuterie board, it was the center of the party, but this time it got eaten!! It cost me half the price of what it would to put together a fancy cheese board and was more festive for St. Paddy’s Day than charcuterie! Now, treat boards are a trend I can stand FIRMLY behind!
Easter Treat Board
Tips for Putting Together a Charcu-TREAT Board:
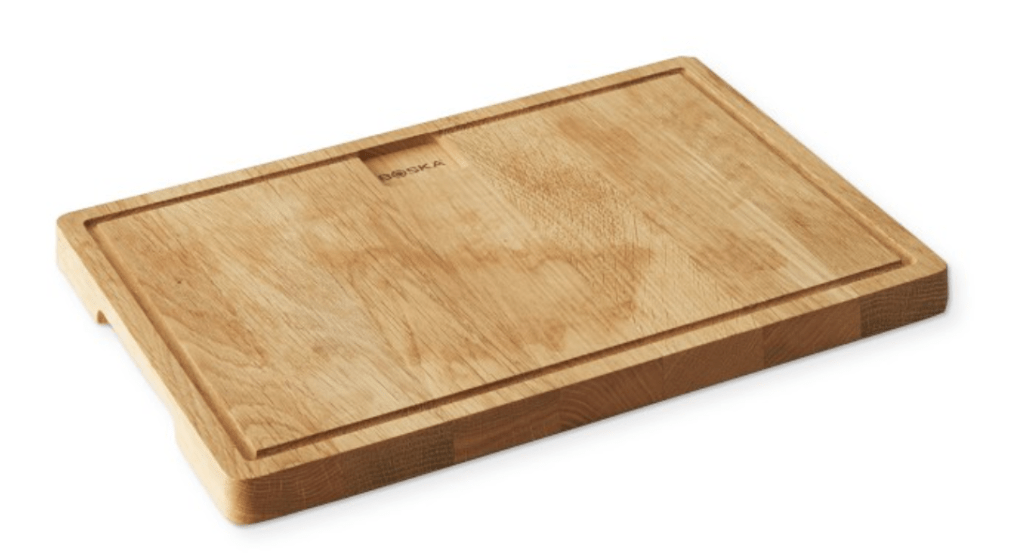
Choose a large board – You can use a classic cheese board in a rectangle or round shape, or choose a tray to keep the treats from rolling off your board. Holiday themed serving platters, like this Easter platter, makes the treat board extra fun and festive!
Pick a color scheme – This is easy for holidays, like St. Patrick’s Day, Easter, Fourth of July, Halloween and Christmas. For other celebrations, have the treat board match your party decor colors. For example, if you’re hosting a Spiderman themed kids birthday, look for red, blue and black candies and sweet snacks.
Incorporate party decor – To add some festive flair and help fill space on your board, incorporate leftover decor that you’re already using for the party. For example, I used Easter grass on my Easter board. You also could add a porcelain bunny!
Choose a variety of candies, chocolate and sweet snacks – Candies could include jelly beans, sour straws, gummy bears; Chocolate could include M&Ms, wrapped chocolates, chocolate covered almonds; Sweet snacks can include fruit, cookies, rice crispy treats, or chocolate dipped pretzels, cookies.
Have one or two homemade items – One of the benefits of a treat board is little to no prep work, but to make the boards special, I like to add one or two homemade items, like chocolate dipped rice crispy treats or cookies in cutout shapes that fit the theme of the party.
Utilize small bowls – Make the board interesting by incorporating two or three bowls filled with candy. This also is a good way to corral smaller candies into one place.
Steps to Put Together a Treat Board:
Gather a board and 2-3 small bowls, along with sweets, treats and decor you wish to use for your board.Ideas for boards, candy, chocolate and sweet snacks are listed at the bottom of this post!
Place the small bowls and whatever else you want to be the centerpiece on your board. For example, on the Easter board, I put the small bowls and the chocolate Easter bunny on the board first. For the St. Patrick’s Day board, I made the fruit rainbow first.
Add larger items, like cookies, brownies, rice crispy treats, etc. Arrange them in fun ways to add visual interest, like rows, fanned, or a pattern. These larger items are also great for creating barriers for the smaller items to stay in place on the board.
Fill in the rest of the board with smaller treats, like jelly beans, marshmallows and M&Ms, and pay attention to color distribution.
Add small spoons to bowls and offer small plates or cups next to the board for guests to take their favorite treats with them!
Voila! Kids and adults alike will go nuts over a fun themed treat board!
3. Pottery Barn Connor Ash Wood Tray – I like to use trays with edges to keep all the treats in one place. This makes the board easier to move, if needed, without candies rolling off the sides.
4. CB2 Gold Cocktail Spoons – Gorgeous gold spoons really elevate the board. Use these for guests to scoop up little treats, like M&M’s and marshmallows.
Brownies – Who doesn’t love a chocolatey brownie? Use cookie cutters to make the treats coincide with your board’s theme, like eggs, bunnies and flowers for spring!
Fruit – Berries, grapes, peeled mandarin oranges, and sliced mango, pineapple and apples
I’d love to hear your ideas for future treat boards! Share your favorite treat board goodies or theme ideas in the comments below! Be sure to follow me on Instagram and TikTok for more fun family-friendly ideas!
XO Maggie
AFFILIATE DISCLOSURE: Some of this post contains affiliate links for the products I use and LOVE. If you take action on these links (like clicking, buying, etc.), I may receive compensation at no cost to you. As always, all opinions are my own, and I’ll only recommend what I truly love. For more information about affiliates and your privacy, view our Terms & Conditions page here.