Imagine this: Halloween is one day away (or today!!), and you signed up to bring treats to the class party, or perhaps you offered to host your neighbors for a get-together before trick-or-treating… Or, maybe you simply want to surprise your kids with a spooky spread when they get home from school… And, you still haven’t figured out what food you’re making! AHHHH!! Last-minute party prep is scarier than Halloween movie flicks!! Look, I’ve been in these situations, too, so I get it! I’m a busy mom balancing school drop-offs/pickups, work, children’s activities, housework, marriage and volunteer commitments all while trying to squeeze in workouts and self-care… Phew! Can’t you relate?
Thankfully, my last-minute habit (some may call it “procrastination”) has made me quick and creative when it comes to pulling together fun, festive food for parties and holidays. And, thankfully, with our fab grocery stores in Southern California, like Smart & Final, there’s so many ways to make fast and festive semi-homemade food for Halloween or any themed party!
Smart & Final sponsored a KTLA Morning News segment that I hosted about last-minute Halloween food, and I’m sharing my tips below. I have 7 of my favorite wicked Halloween party food ideas that you can pull together in no time! From dips to treats and drinks, you can create a spooktacular spread with these recipes! If you’d like to watch the full TV segment featuring these recipes, scroll to the bottom of this blog post.
Frankenstein Layered Dip with Spooky Tortilla Crisps
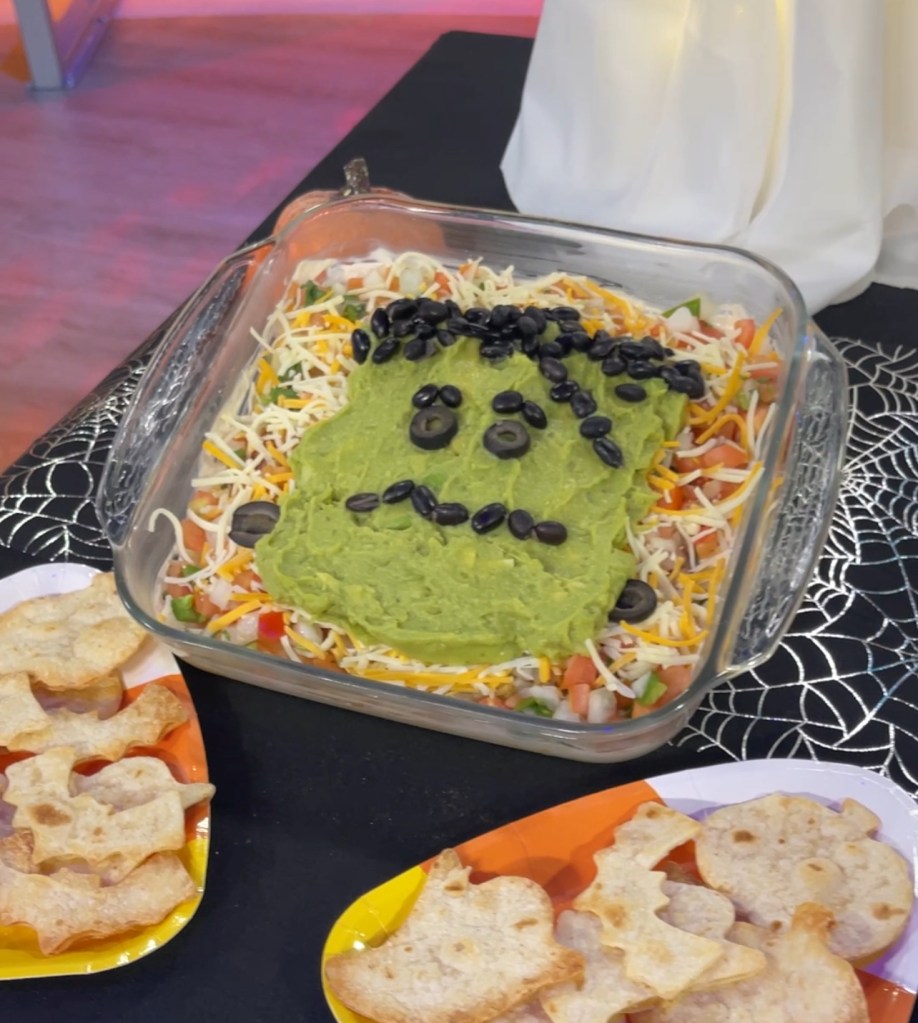
This is a spooktacular twist on a crowd-pleasing layered dip! Mexican food is one of my favorites, and this dip combines all the best “South of the Border” flavors with sour cream, taco seasoning, pico de gallo, cheese, guacamole and black beans. Make this recipe even more frightfully fun with Halloween-themed tortilla crisps created with spooky-themed cookie cutters, flour tortillas, butter and garlic salt. This recipe is available on my blog here.
Candy Corn Fruit Cups
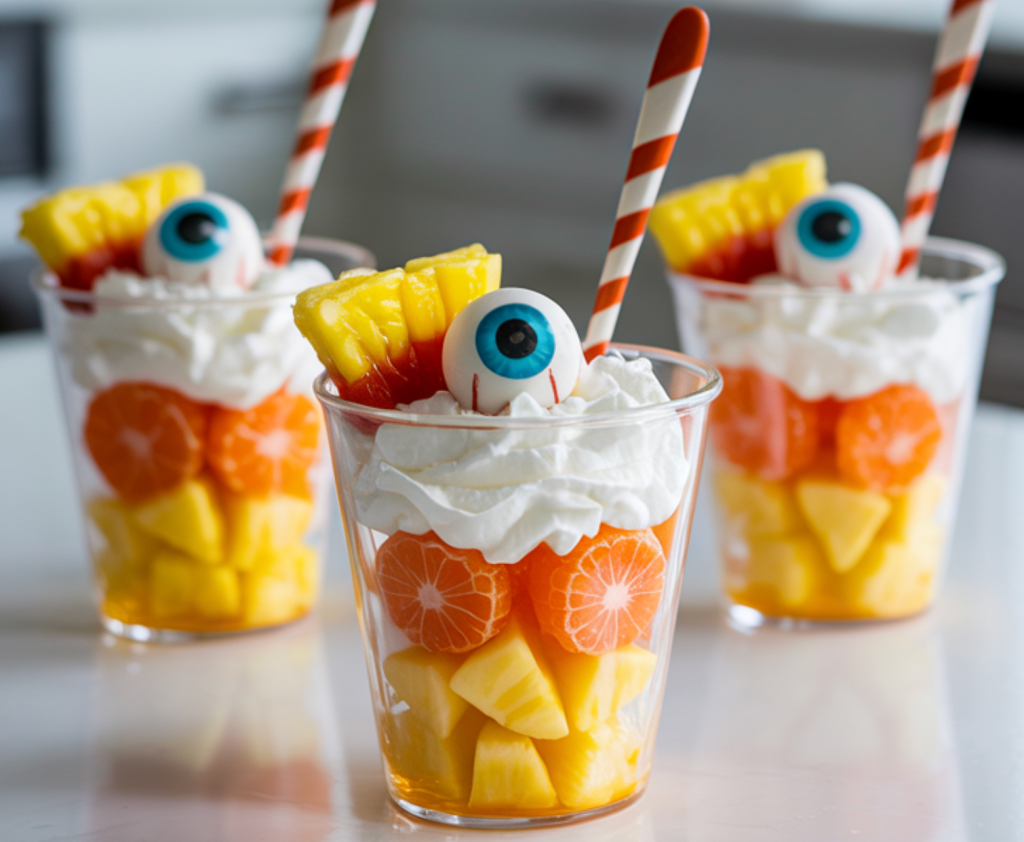
Here’s a recipe that’s semi-healthy, pretty-looking and SO EASY to put together! To create these candy-corn inspired fruit cocktail cups, use a clear cup and simply layer yellow pineapple on the bottom, mandarin oranges in the middle and whipped cream on top. Add a sprinkle of real candy corn (optional), and voila! Yummy, sweet candy corn fruit cups that the whole family will love!

Nutella Banana Mummy Wraps
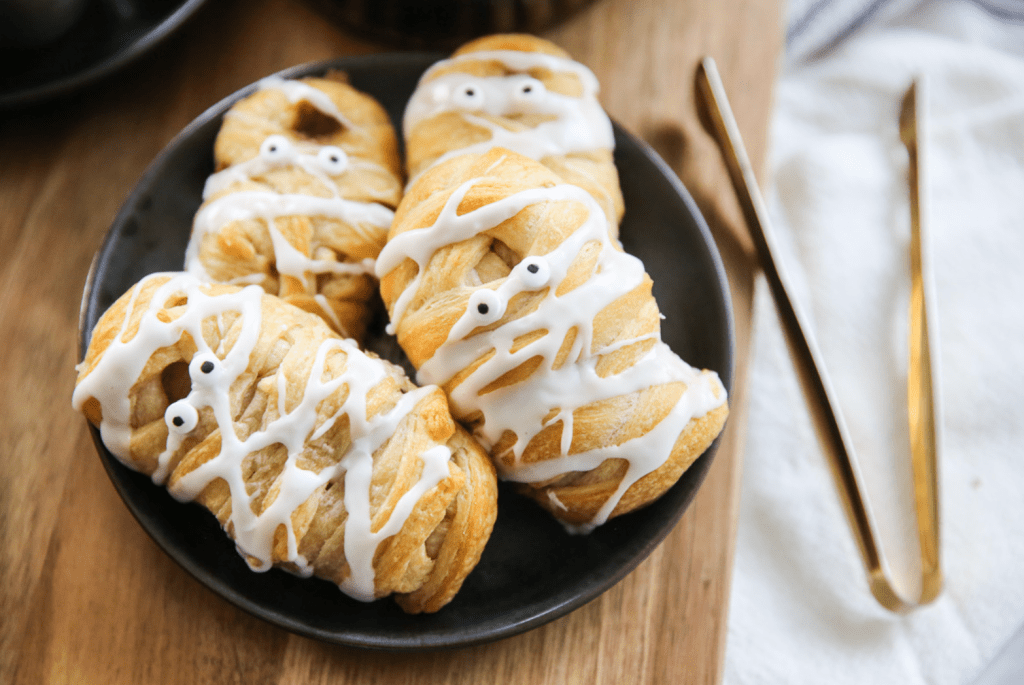
Here’s a treat that’s as adorable as it is spooky: the Nutella Banana Mummy Wraps (credit: Our Best Bites). Ripe bananas wrapped snugly in buttery crescent-dough, layered with creamy Nutella and topped with candy eyes that peer out from their “bandages” — it’s the perfect mix of playful and delicious. With minimal fuss, you’ve got a quick assembly that invites kids to help (who doesn’t love wrapping their “mummies”?), and the bake time means you’ll have fresh pastries just as your little ghouls arrive for trick-or-treating or Halloween party. Serve them warm, let the chocolate and banana mingle in every bite, and watch your gathering light up with “oohs” and “ahhs.” For the complete recipe, visit Our Best Bites here.
Cheesy Crescent Witch Hats

These Cheesy Crescent Witch Hats are the perfect savory spell for your Halloween spread! 🧙♀️✨ With only 3 ingredients — buttery crescent rolls, gooey melted cheese, and a couple spooky pepperoni stars — they’re delightfully simple to make yet look like something straight out of a witch’s kitchen. Kids will love helping roll the dough into “pointy hats,” and adults will appreciate that they’re warm, flaky, and ready in minutes. Serve them as a snack, side, or appetizer at your Halloween party — they’re frightfully festive, crowd-pleasing, and guaranteed to disappear faster than you can say abracadabra!
All you need is a can of Pillsbury Original Crescent Rolls, three mozzarella cheese sticks and pepperoni slices. Use a mini cookie cutter to cut the pepperoni into spellbinding stars and moons.
Cheesy Crescent Witch Hats Recipe Directions:
- Unroll crescent dough on a baking sheet.
- Cut cheese sticks into thirds, and place each of the small cheese stick pieces in the middle of the wide base of each crescent dough triangle.
- Roll the base of each hat over the cheese to cover completely. Pinch the sides of the hat to seal.
- Cut pepperonis into mini stars and moons, and place on top of hats.
- Bake at 400° for 10 minutes.
- Serve with ranch, marinara or pizza sauce for dipping!
Graveyard Trifle

This Graveyard Trifle is a frightfully fun and decadent no-bake dessert that’s guaranteed to steal the show at any Halloween gathering! Layers of rich, moist chocolate bundt cake (I purchased two at the bakery section at Smart & Final), creamy chocolate pudding, and fluffy whipped cream create a deliciously spooky trifle cake, while the top transforms into an edible “graveyard.” Milano cookies and Hershey bars serve as tombstones, ghostly marshmallow Peeps rise from the “dirt,” and candy pumpkins add the perfect festive touch. It’s the ultimate combination of playful presentation and irresistible flavor — easy to assemble, fun for kids to decorate, and a total crowd-pleaser for anyone with a sweet tooth. A dessert so good, it’s to die for!
Tools needed for Graveyard Trifle:
- Large trifle bowl
- Cutlery (spoon and knife)
- Large serving spoon
Ingredients:
- Two (2) chocolate bundt cakes (I used two 36oz cakes from Smart & Final grocery store)
- One (1) large 16oz Original Cool Whip container, thawed
- Five (5) packages of Snack Pack Chocolate Pudding (equals 20 pudding cups total); alternatively, you can make chocolate pudding with JELL-O Chocolate Pudding mix
- Sweet decorations, like Milano cookies, Hershey chocolate bars, Peep marshmallow ghosts, candy pumpkins
Directions:
- Cut bundt cakes into small bite-size pieces. Save a small portion to crumble for the trifle’s topping at the end.
- In a large trifle bowl, add half of the bundt cake pieces. Next, layer 10 Snack Pack cups of chocolate pudding, then half of the large Cool Whip container. Repeat layers once more: cake, pudding, Cool Whip.
- Use saved crumbled cake pieces to create “dirt” on the last layer of Cool Whip. Make a graveyard scene on top with decorations like Milano cookies, Hershey chocolate bars, Peep marshmallow ghosts and candy pumpkins.
- Serve immediately. Store leftovers in refrigerator.
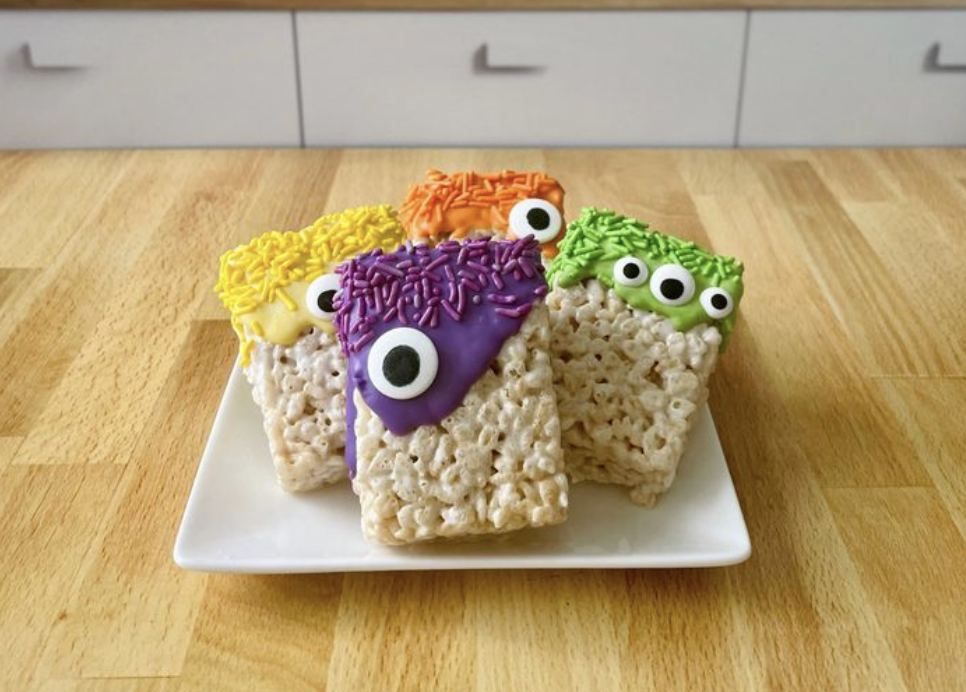
Monster Rice Krispies Treats
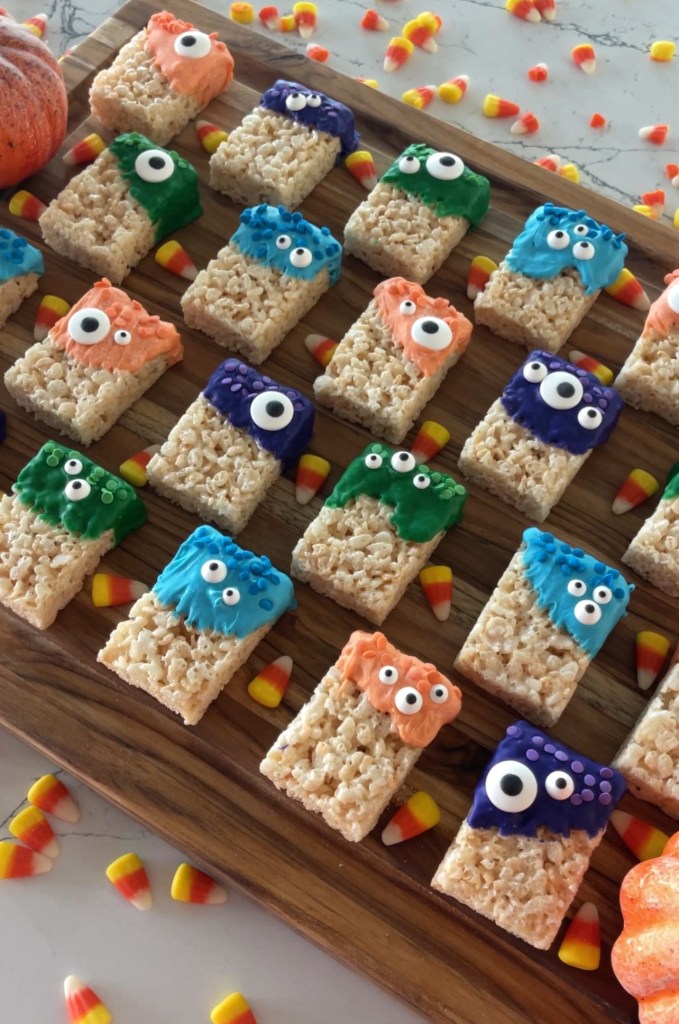
These Monster Rice Krispies Treats are my kids’ favorite! You can make your own Rice Krispy Treats or cut corners, like I did, and use store-bought. These are so easy, it’s scary! Your kids will love helping you make them! Plus, I love that the process of making them does not have to be perfect. Odd-looking monsters is what makes these treats perfect for a ghoulish Halloween party!
Ingredients:
- Large Box of Rice Krispy Treats (includes 40 individually wrapped treats)
- Four (4) cups white chocolate
- Four (4) different colors of food coloring (I used orange, green, purple and blue)
- Sprinkles (use the same colors as chosen food coloring)
- A variety of different sized candy eyeballs
Directions:
- Unwrap 10 Rice Krispy Treats while melting 1 cup of white chocolate in a microwave safe bowl. Stir until smooth. Add a couple drops of food coloring of choice to chocolate and stir until color is completely well mixed.
- Dip one end of the Rice Krispy Treat into the colored chocolate. Dip each treat slightly different to make each coating look odd and spooky. Place dipped treat on parchment paper.
- Add a variety of candy eyeballs to each treat. Get creative with different sizes and 1-3 eyeballs per treat to make them look creepy.
- Make “hair” on the monster treat by adding sprinkles to the tops of the treats.
- Repeat steps 1-4 for the other three food coloring colors.
- Allow treats to dry for 30 minutes and serve immediately. Leftovers can be stored in a sealed container for several days.
3-Ingredient Halloween Punch

This Halloween punch from the I Heart Naptime blog is as easy as it is eerie, and it’s sure to be your new go-to. With just three ingredients (chilled orange soda or Sprite, pineapple juice, and scoops of orange sherbet), this recipe brings bright, spooky color and fizzy fun in minutes. The vivid orange hue fits perfectly into any Halloween spread, and the sherbet floating on top adds a playful, kid-friendly float effect that will have little trick-or-treaters and grown-ups alike reaching for seconds. What I love most: it’s practically no-stress — prep the soda and juice ahead of time, scoop in the sherbet right before guests arrive, and you’ve got a drink that looks festive, tastes delicious, and leaves you free to chat and celebrate instead of hiding in the kitchen.
Ingredients:
- 1 (2-liter) bottle Sprite or Orange Soda, chilled
- 1 cup pineapple juice , chilled
- 1 pint orange sherbet
- Optional decoration: Plastic eyeballs
Directions:
- In a punch bowl or pitcher, stir together the Sprite and pineapple juice. Scoop the sherbet into the bowl just before serving.
- Place plastic eyeballs or other decoration on top, if desired. Serve immediately.
Halloween Recipes on TV!
Watch all these recipes in action during my KTLA Morning News TV segment about family-friendly, last-minute Halloween party food below.
I’d love to hear what you think of these Halloween recipes! Leave a comment below, or connect with me on Instagram and TikTok!
XO Maggie